

There’s perhaps no single factor that impacts your chainsaw’s performance, efficiency, and safety more profoundly than the sharpness of its chain. A dull chain doesn’t just make your work harder; it’s genuinely dangerous, leading to kickback risks, excessive wear on your saw, and poor-quality cuts. Understanding how to use a chainsaw sharpener effectively isn’t just a skill; it’s a fundamental requirement for anyone operating this powerful tool.
Table Of Content
- Understanding Your Chainsaw Chain’s Anatomy Before Sharpening
- Choosing the Right Chainsaw Sharpener for Your Needs
- The Core Principles of Effective Sharpening
- 1. Identifying the Correct File Size
- 2. Understanding Filing Angles
- 3. Setting the Depth Gauge (Raker) Height
- Step-by-Step Guide to Manual Chainsaw Sharpening
- 1. Secure Your Saw
- 2. Identify the Shortest Cutter
- 3. Position the File Correctly
- 4. File Each Cutter
- 5. Address the Depth Gauges
- 6. Flip and Repeat
- Using an Electric Chainsaw Sharpener for Precision
- 1. Setup and Calibration
- 2. Grinding Each Cutter
- 3. Checking Depth Gauges
- What to Watch Out For During Sharpening
- Common Chainsaw Sharpening Mistakes to Avoid
- 1. Failing to Clean the Chain
- 2. Using the Wrong File Size
- 3. Inconsistent Pressure or Strokes
- 4. Ignoring the Depth Gauges
- 5. Sharpening Only One Side
- 6. Filing on the Pull Stroke (for Manual Sharpening)
- Maintenance and Longevity Tips for Your Sharpened Chain
- Frequently Asked Questions
- How often should I sharpen my chainsaw chain?
- What are the main angles I need to know for sharpening?
- Can I sharpen a chain too many times?
For decades, I’ve seen firsthand the difference a properly sharpened chain makes—transforming a frustrating, tiring job into a smooth, efficient operation. This comprehensive guide will walk you through everything you need to know, from the anatomy of your chain to the nuances of both manual and electric sharpeners, ensuring your saw is always ready to bite into wood with surgical precision.
Understanding Your Chainsaw Chain’s Anatomy Before Sharpening
Before you even pick up a file or power up a grinder, it’s absolutely crucial to understand the basic components of your chainsaw chain. This isn’t just academic; knowing these parts will clarify *why* you’re sharpening certain areas and how they interact to create a cutting edge. Without this foundational knowledge, you’re essentially sharpening blind, which, in my experience, leads to inconsistent results and a chain that dulls quickly or cuts poorly.
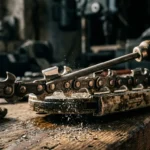
Every cutting link on your chain consists of several key elements: the cutter tooth itself, and the depth gauge (often called a raker). The cutter tooth is the star of the show, featuring a top plate, a side plate, and a critical cutting corner where these two meet. The angle and sharpness of this corner are what actually slice through wood fibers. The top plate’s angle determines how aggressively the chain cuts, while the side plate’s angle influences the smoothness and cleanliness of the cut. These angles are not arbitrary; they are precisely engineered for optimal performance and must be maintained during sharpening.
Then there’s the depth gauge, a small, rounded protrusion located just in front of each cutter tooth. Its purpose is often misunderstood, but it’s incredibly vital. The depth gauge controls how deep the cutter can penetrate the wood in a single pass. Think of it as a limiter. If the depth gauge is too high, the cutter won’t be able to bite deeply enough, resulting in fine sawdust instead of robust chips. If it’s too low, the cutter will bite too aggressively, leading to excessive vibration, kickback, and rapid dulling. Proper depth gauge setting is paramount for safety and efficiency, and it’s a step many beginners overlook entirely, much to their detriment.
Choosing the Right Chainsaw Sharpener for Your Needs
The market offers a variety of tools for sharpening a chainsaw chain, each with its own advantages and learning curve. Your choice typically boils down to manual methods, like round files and filing guides, or powered options, such as handheld or bench-mounted electric sharpeners. Both have their place, and honestly, a well-equipped chainsaw owner might even benefit from having both types on hand for different situations.
Manual Sharpeners: Round Files & Filing Guides
For regular touch-ups and field sharpening, nothing beats a manual round file combined with a filing guide. These are lightweight, portable, and relatively inexpensive. A good quality file set, correctly sized for your chain’s pitch, can produce an incredibly sharp edge with practice. The key here is consistency. Each stroke must apply even pressure and maintain the correct angle.
For example, imagine this situation: you’re deep in the woods, far from any power source, felling a few trees, and your saw suddenly starts pulling to one side and producing dusty cuts. What would you do? This is where a simple manual chainsaw sharpener shines. A quick, precise touch-up with a file and guide, and you’re back in action, minimizing downtime and maximizing productivity.
Electric Sharpeners: Bench-Mounted & Handheld
When it comes to restoring heavily damaged chains or achieving factory-level precision, an electric chainsaw sharpener is often the superior choice. Bench-mounted models, like those from Oregon or Stihl, clamp your chain securely and feature adjustable guides for precise angle control, ensuring every tooth is sharpened identically. Handheld electric sharpeners offer a compromise, providing more consistency than a manual file while still being somewhat portable. The main advantage of electric sharpeners is their ability to grind away material quickly and consistently, perfect for when you’ve hit dirt or rocks and severely dulled several teeth. They take out the guesswork of maintaining angles by hand, which can be a significant benefit for beginners or those who sharpen frequently.
Here’s a quick comparison to help you weigh your options:
| Feature | Manual Sharpeners (Files & Guides) | Electric Sharpeners (Bench-Mounted) |
|---|---|---|
| Cost | Low (typically $15-$50 for a good kit) | Moderate to High (typically $60-$200+) |
| Portability | Excellent (pocket-sized) | Limited (requires power, bench space) |
| Precision & Consistency | Requires skill and practice | High (consistent angles, repeatable results) |
| Speed | Slower for severe dulling | Faster, especially for multiple teeth |
| Learning Curve | Moderate | Low to Moderate (setup can be tricky) |
| Ideal Use | Field touch-ups, light dulling, regular maintenance | Heavy sharpening, restoring damaged chains, high volume |
The Core Principles of Effective Sharpening
Regardless of whether you choose a manual or electric method, there are fundamental principles that govern effective sharpening. Neglect any of these, and you’ll find yourself with a chain that cuts poorly or doesn’t last. In my opinion, mastering these principles is far more important than the specific tool you use.
1. Identifying the Correct File Size
This is non-negotiable. Using the wrong file size is one of the most common mistakes I see. Chains come in different pitches (e.g., .325″, 3/8″ Low Profile, 3/8″, .404″), and each pitch requires a specific diameter round file. Using a file that’s too small won’t adequately sharpen the gullet, leaving a weak cutting edge. A file that’s too large will remove too much material from the top plate and can damage the cutter. Always check your chainsaw’s manual or the markings on the chain itself (often on the depth gauge or drive link) for the correct file size. For example, a Stihl MS 250 with a 3/8″ pitch chain typically uses a 5.2mm (13/64″) file.
2. Understanding Filing Angles
This is where the real art and science of chainsaw filing angles come into play. There are generally three critical angles:
- Top Plate Filing Angle (or Working Angle): This is the angle at which you file across the top of the cutter tooth, typically 25-30 degrees relative to the guide bar. This angle is crucial for the aggressiveness of the cut.
- Side Plate Angle (or Grinding Angle): This refers to the angle of the file against the side plate of the cutter. Most chains require a 85-90 degree angle.
- Down Angle (or Hook/Lean Angle): This refers to the slight downward tilt of the file, typically 10 degrees, ensuring the cutting edge has a proper “hook” for efficient wood removal.
Many modern filing guides, like the popular Stihl 2-in-1 Easy File, are designed to automatically help you maintain these crucial angles, significantly simplifying the process for beginners. Without the correct angles, the chain simply won’t cut effectively, no matter how sharp you get it.
3. Setting the Depth Gauge (Raker) Height
As we discussed, the depth gauge dictates the chip thickness. After sharpening the cutters several times, the depth gauge will effectively become “too high” relative to the now-shorter cutter tooth. It must be filed down to the correct height. This is done using a depth gauge tool, which typically has a slot to rest over the cutter and a small ramp that shows you how much material to remove from the depth gauge. A flat file is then used to carefully file down the depth gauge until it’s flush with the tool. Get this wrong, and your chain will either clog with fine dust or chatter aggressively.
Step-by-Step Guide to Manual Chainsaw Sharpening
Let’s get down to the practical application. While an electric sharpener offers precision, every chainsaw owner should know how to properly sharpen by hand. It’s an indispensable skill. Always wear appropriate chainsaw safety gear, including gloves and eye protection, even when sharpening.
1. Secure Your Saw
Before you do anything, ensure your chainsaw is off, the chain brake is engaged, and the guide bar is firmly secured. A workbench vice is ideal for this. The chain needs to be stable and unable to move freely during sharpening. This isn’t just about making the job easier; it’s a fundamental safety measure.
2. Identify the Shortest Cutter
Scan your chain and find the shortest cutter tooth. This tooth will be your reference point. You’ll sharpen all other teeth to match the length of this shortest one. This ensures uniform cutting performance across the entire chain. If you always sharpen to the shortest tooth, you’ll maximize the life of your chain while maintaining balance.
3. Position the File Correctly
Place your round file into the gullet of the cutter, with the filing guide (if you’re using one) resting on the top plate and depth gauge. Ensure the file is angled correctly (usually 25-30 degrees relative to the bar, pointing slightly downwards for the lean angle). The file should only cut on the push stroke, not on the pull stroke. Apply consistent, firm pressure.
4. File Each Cutter
With smooth, even strokes, push the file across the cutter. Count your strokes for each tooth – typically 3-5 strokes are sufficient for a touch-up. For severely dull teeth, it might take more. The goal is to remove enough material to achieve a shiny, sharp edge without over-filing. Remember to only file the teeth facing in one direction first (e.g., all right-hand cutters). This helps maintain consistency.
5. Address the Depth Gauges
After you’ve sharpened all the cutters on one side of the chain, it’s time to check the depth gauges. Place your depth gauge tool over the chain, aligning it with the cutter you just sharpened. Use a flat file to carefully file down any part of the depth gauge that protrudes above the tool. Be gentle here; removing too much material will make the chain too aggressive and prone to kickback.
6. Flip and Repeat
Once you’ve completed all the cutters and depth gauges on one side, rotate your chainsaw 180 degrees (or flip the bar) and repeat the entire process for the cutters facing the other direction. Again, start with the shortest tooth on this side, ensure correct angles, and apply consistent strokes. This meticulous process ensures a balanced and efficient cutting chain.
Using an Electric Chainsaw Sharpener for Precision
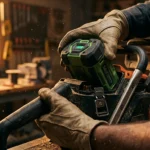
While manual sharpening is essential, an electric sharpener can be a game-changer for speed and precision, especially for those with multiple chains or frequent sharpening needs. I often recommend an electric sharpener for those who find maintaining angles by hand challenging or who need to restore heavily damaged chains quickly.
1. Setup and Calibration
The first step with an electric chainsaw sharpener is proper setup. Securely mount the sharpener to a sturdy workbench. Then, clamp your chainsaw chain into the sharpener’s vise. This is critical. Consult your sharpener’s manual to set the correct grinding wheel angle (top plate angle) and the chain vise angle (side plate angle) for your specific chain. Precision here ensures consistent, factory-grade edges. Most sharpeners allow for micro-adjustments, so take your time to get it right. Also, ensure the depth stop is set so the wheel grinds just enough to create a sharp edge without removing excessive material.
2. Grinding Each Cutter
Once calibrated, engage the grinding wheel and carefully bring it down onto the first cutter tooth. Apply consistent, light pressure. The goal is to remove minimal material until a burr forms on the opposite side of the cutting edge. This burr indicates you’ve achieved a full edge. Perform one to two passes per tooth, allowing the wheel to do the work. It’s often best to sharpen all the cutters facing one direction first, then adjust the vise to sharpen the opposing cutters. This streamlines the process and ensures uniformity.
3. Checking Depth Gauges
Even with an electric sharpener, the depth gauges may still need attention. While some electric sharpeners have attachments for depth gauge filing, many users prefer to handle this manually with a flat file and a depth gauge tool after the cutters are sharpened. This allows for fine-tuning and ensures you don’t accidentally remove too much material, which is easier to do with a powered grinder.
What to Watch Out For During Sharpening
Even experienced users can make mistakes, so constant vigilance is key:
- Uneven Tooth Lengths: If some teeth are significantly shorter than others, your chain will cut poorly and pull to one side. Always sharpen to the shortest tooth.
- Over-filing Depth Gauges: Too low, and your chain becomes aggressive, prone to kickback, and wears out faster. Too high, and it won’t cut.
- Incorrect Angles: If your angles aren’t right, the chain simply won’t perform. It might tear wood, make rough cuts, or dull quickly.
- Burrs: After sharpening, a tiny burr often forms on the cutting edge. This indicates a sharp edge. Gently remove it with a light pass of the file or a deburring stone, but be careful not to dull the newly formed edge.
Common Chainsaw Sharpening Mistakes to Avoid
In my years of working with chainsaws, I’ve seen nearly every sharpening mistake imaginable. Avoiding these common pitfalls will save you frustration, prolong your chain’s life, and enhance safety.
1. Failing to Clean the Chain
It sounds simple, but many skip this step. A dirty chain, especially one caked with sap or sawdust, will quickly clog your file or grinding wheel, making effective sharpening impossible. Always give your chain a good cleaning with a wire brush and some degreaser before sharpening.
2. Using the Wrong File Size
As mentioned earlier, this is a critical error. A file that’s too small won’t properly sharpen the gullet, while one that’s too large can damage the cutter and remove too much material. Always verify the correct file diameter for your chain’s pitch.
3. Inconsistent Pressure or Strokes
For manual sharpening, uneven pressure or an inconsistent number of strokes per tooth will result in uneven cutter lengths and varying sharpness, leading to a chain that cuts poorly or pulls to one side. Aim for uniform pressure and count your strokes for each tooth.
4. Ignoring the Depth Gauges
This is perhaps the most overlooked aspect of proper chainsaw sharpening. Sharpening the cutters without also adjusting the depth gauges renders the cutters ineffective, as they can’t bite into the wood properly. Always follow up cutter sharpening with depth gauge adjustment.
5. Sharpening Only One Side
Believe it or not, I’ve seen this happen. Some users mistakenly only sharpen the cutters on one side of the chain, assuming it’s enough. This creates an incredibly unbalanced chain that will constantly pull your saw to one side, making cutting difficult, tiring, and dangerous.
6. Filing on the Pull Stroke (for Manual Sharpening)
Round files are designed to cut only on the push stroke. Pulling the file back towards you with pressure will dull the file’s teeth and won’t effectively sharpen the chain. Always lift the file slightly or relieve pressure on the return stroke.
Maintenance and Longevity Tips for Your Sharpened Chain
Getting a razor-sharp edge is only half the battle. Maintaining it and ensuring the longevity of your chain is equally important. A well-cared-for chain will last longer, require less frequent sharpening, and perform better overall.
Firstly, always keep your chain clean. Sap, pitch, and sawdust can quickly build up, reducing cutting efficiency and making subsequent sharpening harder. After each use, especially if cutting sappy wood, clean your chain with a brush and a solvent. Secondly, proper storage is crucial. When not in use, store your chain in a clean, dry place, ideally coated with a thin layer of bar oil to prevent rust. Avoiding contact with dirt or concrete is paramount – even a brief touch can instantly dull a perfectly sharpened edge.
Finally, know when it’s time to retire a chain. While regular sharpening can extend a chain’s life considerably, there comes a point when the cutters become too short, or critical components like the drive links are damaged or worn. Continually sharpening a chain until the cutters are tiny nubs reduces its effectiveness and increases the risk of breakage. When the original “witness marks” (small lines on the top plate that indicate the minimum safe sharpening length) are no longer visible, or if the chain shows signs of cracking or excessive stretching, it’s time for a replacement. Investing in a new chain is far safer and more efficient than pushing a worn-out one past its limits.
Frequently Asked Questions
How often should I sharpen my chainsaw chain?
There’s no fixed schedule, but a good rule of thumb is to sharpen your chain every time you refuel your saw. If you notice fine sawdust instead of chips, the saw pulling to one side, or excessive smoke during cutting, it’s definitely time to sharpen.
What are the main angles I need to know for sharpening?
The primary angles are the top plate filing angle (usually 25-30 degrees relative to the bar), the side plate angle (typically 85-90 degrees), and the depth gauge setting. Your chainsaw manual will provide the precise angles for your specific chain.
Can I sharpen a chain too many times?
Yes, eventually the cutter teeth become too short to cut effectively or safely. Most chains have witness marks on the top plate; when you’ve filed past these marks, the chain has reached the end of its usable life and should be replaced.