



Mastering Large Tree Felling: Advanced Chainsaw Techniques
Felling a large tree is one of the most demanding and dangerous tasks a chainsaw operator can undertake. While basic felling principles apply, larger trees demand a deeper understanding of tree mechanics, advanced cutting techniques, and an unwavering commitment to safety. As your trusted chainsaw professional, I’m here to guide you through the intricacies of advanced felling, but let me be clear: if you have any doubts, or if the tree poses significant risks, always call a certified arborist. This guide is for those with significant prior chainsaw experience.
Table Of Content
Safety First: Non-Negotiable Prerequisites
Before even thinking about an advanced cut, ensure you have:
- Full Personal Protective Equipment (PPE): Helmet with face shield and hearing protection, chainsaw protective trousers (chaps), steel-toed boots, and gloves.
- Thorough Site Assessment: Identify the tree’s natural lean, surrounding obstacles, escape routes (clear at least two), wind direction, and potential hazards like dead branches (widowmakers).
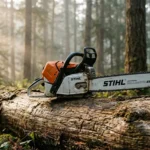
- Sharp, Powerful Chainsaw: For large trees, you’ll need a professional-grade saw with sufficient power (e.g., 60cc+ for a 20-inch bar or larger) and a bar long enough to make efficient cuts (at least 2/3 of the tree’s diameter). Models like the Stihl MS 362, Husqvarna 560 XP, or Echo CS-590 Timber Wolf are good examples for serious work.
- Felling Wedges: Plastic or aluminum wedges are crucial for controlling the fall and preventing kickback. Carry several.
Understanding the Open Face Notch
Forget the conventional 45-degree notch for large trees. The open face notch is superior for directional control, especially with taller, heavier timber. It creates a wider hinge (typically 70-90 degrees), allowing the tree to fall further before the hinge breaks, providing more control over the felling direction.
- Undercut (Felling Notch Bottom Cut): Start with a level horizontal cut, about 1/4 to 1/3 of the tree’s diameter deep, on the side of the intended fall.
- Angle Cut (Felling Notch Top Cut): Make a second cut from the top, angled downwards (typically 70-90 degrees from the horizontal cut) to meet the horizontal cut precisely. This creates your open face notch.
The key is precision. The cuts must meet cleanly, forming a perfect hinge point.
The Bore Cut (Plunge Cut) for Enhanced Control
For large trees, especially those with a significant lean or where precise directional control is paramount, the bore cut (also known as a plunge cut) is an indispensable advanced technique. It allows you to create your hinge before making the final back cut, isolating the hinge and minimizing the risk of the tree splitting or “barber chairing” prematurely.
- Prepare Your Notch: First, complete your open face notch as described above.
- Establish the Hinge: On the back side of the tree, about 1-2 inches above the bottom of your notch, begin a bore cut into the center of the tree. Use the lower quadrant of the bar to minimize kickback risk. Slowly push the saw straight into the trunk until the tip emerges on the other side, just above your notch’s hinge point. Cut straight through until you’ve established the desired hinge thickness (typically 10% of the tree’s diameter).
- Complete the Back Cut: Once the hinge is established, withdraw the saw slightly and make your final back cut from the outside, meeting the bore cut. This final cut releases the tree, allowing it to fall in your intended direction, guided by the pre-formed hinge.
The bore cut technique allows you to insert felling wedges into the bore cut before the final back cut, providing additional leverage to push the tree over, especially if it’s leaning against your desired fall direction.
Strategic Use of Felling Wedges
Wedges are not just for stuck saws; they are critical felling tools for large timber. They serve two primary purposes:
- Preventing Pinching: As you make your back cut, the tree’s weight can pinch your bar. Inserting a wedge keeps the kerf open.
- Directing the Fall: By driving wedges into the back cut, you can physically lift and push the tree in the desired direction, overcoming minor leans or ensuring a precise fall. For a bore cut, you can insert wedges into the bore itself to start moving the tree before the final release cut.
Always use a plastic or aluminum wedge, never metal, to avoid damaging your chain. Use a heavy hammer or the blunt side of a felling axe to drive them.
Advanced Scenarios and Considerations
- Trees with Heavy Side Leans: Adjust your hinge slightly towards the lean to compensate, but never rely solely on this. Employ wedges aggressively.
- Rotten or Decayed Trees: These are extremely unpredictable. The hinge may fail unexpectedly. Avoid felling these yourself if possible. If you must, use extreme caution, a very wide open face notch, and consider leaving a thicker hinge.
- Multiple Escape Routes: For complex falls, identify not just one, but multiple clear escape paths to retreat quickly and safely.
Practice and Professional Guidance
These advanced techniques require considerable practice, often starting on smaller trees to perfect your cuts. Consider attending professional felling courses. There’s no substitute for hands-on training under the guidance of an experienced arborist or felling professional. Large tree felling carries inherent risks that can be mitigated with knowledge and skill, but never fully eliminated.
Remember, safety is always your top priority. When in doubt, call a professional.