Disclosure: As an Amazon Associate, we earn from qualifying purchases.
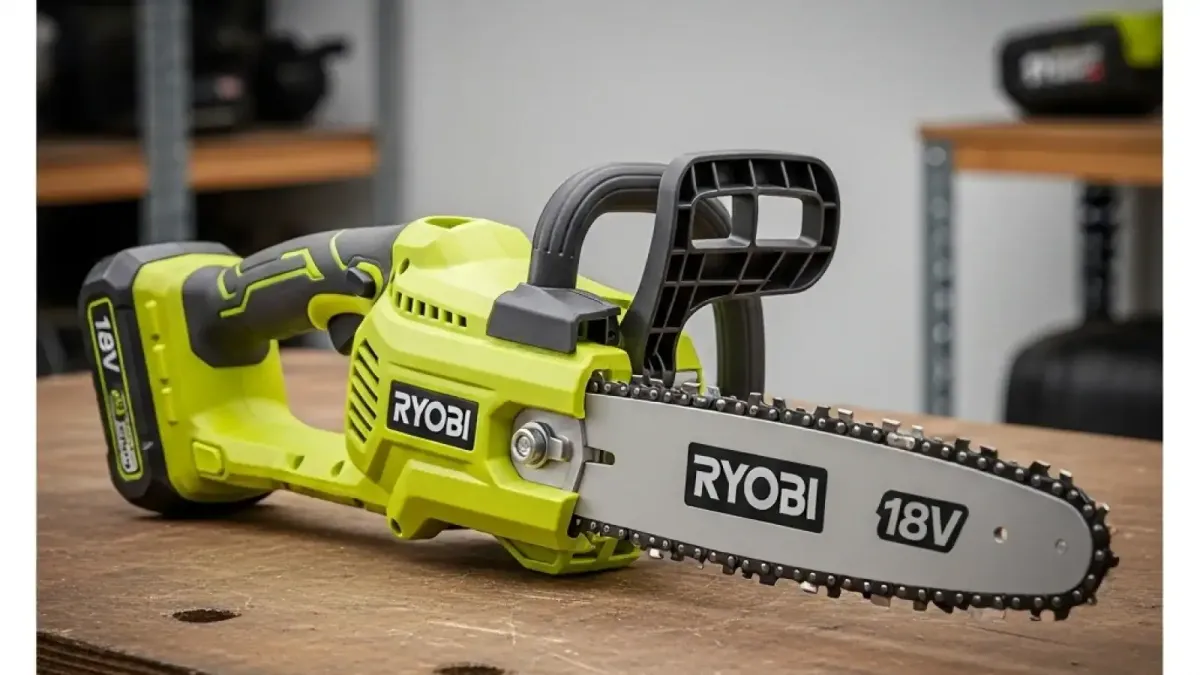
Small-displacement cordless tools have transformed how homeowners approach property maintenance, but keeping a battery-powered saw cutting efficiently comes down almost entirely to the condition and fit of its chain. Because 18-volt motors rely on limited battery amperage to drive the drive sprocket, even a slight mismatch in specifications or a dull cutting edge will drastically drop your runtime and strain the tool's electronics. Understanding how your bar and chain interact allows you to get clean, effortless cuts on everything from routine limb pruning to light firewood processing.Quick answer: Most 18V Ryobi saws—such as the OCS1830—use a 12-inch (30cm) bar requiring a 3/8-inch Low Profile (LP) pitch chain with a .043-inch (1.1mm) gauge and 45 drive links. Maintaining exact pitch and gauge alignment ensures maximum cutting speed, protects your battery motor from overheating, and prevents dangerous chain derailment.
Understanding Ryobi 18V Chain Specifications
Matching a replacement chain to your saw requires reading three critical measurements usually stamped near the tail of the guide bar: pitch, gauge, and drive link count. Pitch refers to the distance between any three consecutive rivets divided by two, which on almost all Ryobi ONE+ cordless chainsaws is 3/8-inch Low Profile (often designated as 3/8" LP or Picco). Gauge indicates the thickness of the drive link where it seats inside the bar groove. Ryobi predominantly uses a ultra-narrow .043-inch (1.1mm) gauge to minimize kerf width, which reduces the volume of wood the motor must pull through during a cut.
The drive link count (DL) dictates the precise length of the chain needed to fit over the drive sprocket and travel along the bar rails. A standard 12-inch Ryobi bar typically demands a 45-drive-link chain, whereas 10-inch top-handle models often take 40 drive links. Getting the link count wrong means the chain will either fail to slip over the nose sprocket or lack sufficient adjustment travel on the tensioning bolt, rendering the saw useless or unsafe.
When selecting a new cutter, pay strict attention to kerf width. Installing a thicker .050-inch (1.3mm) gauge chain on a bar milled for .043-inch drive links will cause instant jamming, while running a .043-inch chain in a wider .050-inch bar rail creates slop that ruins cut accuracy and damages the guide bar. For optimal battery performance, stick with micro-lite or narrow-kerf cutting systems specifically designed for low-draw electric powerheads.
| Chainsaw Model | Bar Length | Chain Pitch | Chain Gauge | Drive Links |
|---|---|---|---|---|
| Ryobi OCS1830 / RY18CSX30A | 12 Inches (30 cm) | 3/8" Low Profile | .043" (1.1 mm) | 45 |
| Ryobi P546 / P547 | 10 Inches (25 cm) | 3/8" Low Profile | .043" (1.1 mm) | 40 |
| Ryobi RY18PSA (Pruner) | 6 Inches (15 cm) | 1/4" Low Profile | .043" (1.1 mm) | 32 |
Cutter Types, Sharpening, and Edge Retention
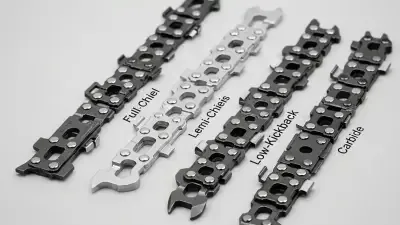
The style of tooth on your chain dictates how fast the saw cuts and how long it holds an edge when working through dirty or sap-heavy wood. Standard factory loops like the Ryobi RAC227 feature semi-chisel cutters, which have rounded working corners. Semi-chisel teeth sacrifice a small fraction of raw cutting speed compared to full-chisel options, but they offer significantly higher resistance to dulling when contacting pine resin, yard dirt, or bark laden with silt.
High-Torque 40V Upgrade Pick: WORX Nitro 16-Inch Cordless Saw

sharpening a .043-inch gauge 3/8" LP chain demands precision, as the teeth are smaller than those found on gas-powered farm saws. You must use a 5/32-inch (4.0mm) round file held at a 30-degree top-plate angle relative to the bar. Consistently stroke the file from the inside of the cutter outward, applying firm upward pressure against the top plate. Take equal strokes on every tooth to ensure straight tracking through the wood cut after cut.
Pro tip: New battery saw users often overtighten their chain right after unboxing. When breaking in a brand-new chain on a Ryobi 18V saw, the rivets will set and stretch slightly within the first 2 to 3 minutes of cutting. Always check your chain tension after making your first few cuts, and never adjust chain tension while the bar is still hot, as the chain will shrink as it cools and pull hard against the crank and drive shaft bearings.
Do not ignore the depth gauges, commonly called rakers, which sit directly in front of each cutting tooth. As you sharpen the cutter back, the height difference between the top plate and the raker decreases, preventing the tooth from biting into the timber. Every third or fourth sharpening, use a drop-in depth gauge tool and a flat file to bring the rakers down to .025 inches below the cutter tip. Proper depth gauge maintenance restores aggressive cutting without stalling the 18V motor.
Upgrading Your Chain for Maximum Runtime
If you want to extract more runtime out of your 4.0Ah or 5.0Ah 18V ONE+ batteries, consider swapping the stock chain for an aftermarket premium option. High-efficiency replacement chains from reputable manufacturers utilize advanced chrome plating on the cutters to maintain razor sharpness up to twice as long as basic stamped steel chains. Less friction at the wood interface directly translates to fewer amps pulled from your battery pack during heavy loads.
Upgrading to a matching Oregon AdvanceCut (such as 90PX Series) or a specialized Stihl Picco Micro Mini loop offers superior vibration damping. Reduced vibration keeps the saw stable in the cut, requiring less push force from the operator. Electric saws cut fastest when allowed to self-feed under their own weight; excessive downward pressure slows motor RPMs and rapidly drains battery capacity while generating heat in the guide bar.
When selecting aftermarket upgrades, always verify that the chain utilizes low-kickback drive links featuring bumper tie straps. Small cordless saws lack the high torque inertia needed to clear severe kickback events safely without mechanical chain brakes engaged. Maintaining low-kickback safety features protects DIYers and homeowners working in awkward positions, such as overhead branch trimming or ladder work.
Replacing, Tensioning, and Maintenance Best Practices
One-Pass Precision Filing: STIHL 5/32" 2-in-1 Easy File Tool

Knowing when to replace a worn-out loop prevents unnecessary wear on your saw's drive sprocket and bar rails. If your Ryobi chainsaw produces fine sawdust instead of distinct wooden chips, pulls sharply to one side while making a straight cut, or requires manual pressure to pull through soft woods, the chain is either severely dull or unevenly worn. When the hard chrome coating on the cutter face wears off entirely, filing will no longer restore a durable edge, making full replacement necessary.
To safely install a new chain, first remove the 18V battery pack to prevent accidental motor engagement. Back off the side-access tensioner screw or dial, remove the clutch cover, and clear out packed sawdust and bar oil buildup around the drive sprocket and oil delivery port. Loop the new chain over the sprocket and into the guide bar groove, ensuring the sharp cutting edges along the top rail face forward toward the bar nose.
Proper tensioning is critical for smooth operation and safety. Tighten the tensioning mechanism until the drive links sit snugly against the bottom of the guide bar rail without sagging. Grasp the chain along the top of the bar and pull upward: you should be able to lift the drive link tangs slightly out of the groove, but they should snap cleanly back into place when released. Check out our detailed guide on proper chainsaw chain maintenance and selection to keep all your cutting gear running smoothly year-round.
Inadequate chain lubrication is the primary cause of premature chain stretch and bar rail destruction. Always use high-quality all-season bar and chain oil rather than motor oil or reclaimed fluids, which lack the tacky additives needed to cling to the high-speed chain links. Inspect the automatic oiler port on your Ryobi powerhead regularly to ensure wood fines haven't blocked oil flow to the bar groove.
Frequently Asked Questions
Can I put a standard 3/8-inch chain on my Ryobi 18V chainsaw?
No, standard 3/8-inch chains have much larger drive links, tooth sizes, and pitch spacing that will not fit the drive sprocket or bar groove of an 18V cordless saw. You must specifically use a 3/8-inch Low Profile (LP) chain with the correct .043-inch gauge matching your bar specs.
How often should I sharpen my Ryobi 18V chainsaw chain?
Sharpen your chain at every battery recharge cycle or whenever you notice the saw producing fine dust instead of wood chips. Lightly touching up the cutters with 3 to 4 file strokes during battery swaps takes only minutes and extends the total lifespan of both the chain and the battery pack.
Battery-Saving Low Friction: Husqvarna Bio Bar & Chain Oil

Why does my new Ryobi chain keep coming loose during use?
New chains naturally stretch as the metal rivets seat under friction and operational heat during the first few cutting sessions. Stop the saw, remove the battery, and re-tension the chain as soon as sag appears beneath the bar rail until the chain stabilizes.
Are Ryobi RAC227 chains compatible with other chainsaw brands?
Yes, as long as the second saw uses a 12-inch guide bar spec'd for a 3/8-inch Low Profile pitch, .043-inch gauge, and 45 drive links. Many compact cordless saws from brands like Milwaukee or Greenworks share these exact bar dimensions.
Choosing Your Next Replacement Chain
For most homeowners using 12-inch Ryobi 18V cordless chainsaws, sticking with an OEM Ryobi RAC227 or upgrading to an Oregon 90PX045G chain yields the best combination of cut speed, run time, and kickback protection. Verify your bar's stamped numbers before buying, keep a fresh 5/32-inch file in your tool kit, and maintain proper oil delivery to keep your saw cutting like new.