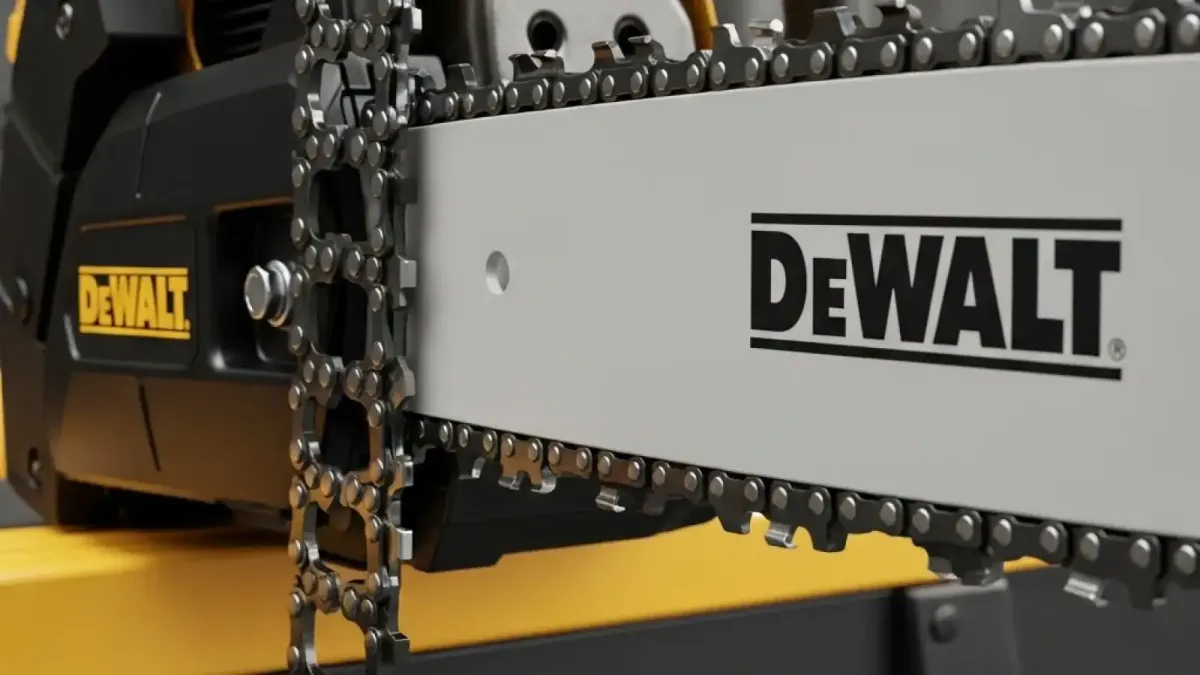
Quick answer: DeWalt battery-powered chainsaws use low-profile pitch and thin-gauge chains—typically 3/8" Low Profile pitch with a .043" gauge for 20V Max models (12-inch bars) and 3/8" Low Profile pitch with a .050" gauge for 60V FlexVolt models (16-inch to 20-inch bars). To find your exact replacement, verify the pitch, gauge, and drive link count stamped on the heel of your guide bar before purchasing from OEM DeWalt or compatible Oregon lines.
Understanding DeWalt Chain Specifications: Pitch, Gauge, and Drive Links
Matching a replacement chain to your DeWalt saw requires understanding three fundamental measurements: pitch, gauge, and drive link count. Pitch represents the average distance between any three consecutive rivets divided by two. DeWalt battery saws predominantly feature 3/8-inch Low Profile (often designated as 3/8" LP or Picco), which minimizes resistance against the electric motor while maintaining smooth cutting performance.
Gauge measures the thickness of the drive links—the inner teeth that fit directly into the groove of your guide bar. Using a chain with an incorrect gauge leads to severe operational problems; a .050" gauge chain forced into a .043" bar groove will bind completely, while a .043" chain in a .050" bar will wobble, producing crooked cuts and accelerating bar rail wear. Most 20V DeWalt top-handle and rear-handle saws use a narrow .043" gauge, whereas the heavier-duty 60V FlexVolt platforms bump up to a stouter .050" gauge.
The drive link count (DL) determines the physical length of the chain loop. You cannot buy a generic "16-inch chain" and assume it will fit every 16-inch DeWalt saw. For example, a 16-inch bar on a DeWalt DCCS670 60v chainsaw requires a 56-drive link chain, while another manufacturer's 16-inch setup might require 55 or 57 links. Always count the drive links on your existing chain or check the laser-etched matrix near the tail of your guide bar before ordering a replacement chain.
Pro tip: New battery-powered chainsaws experience significant chain stretch during the first 15 to 20 minutes of active cutting. When installing a fresh replacement chain, stop after your first few crosscuts to check tension. If the drive links hang lower than the bottom rail of the bar, adjust the tensioner immediately. Allowing a loose chain to run at full speed on a high-torque 60V FlexVolt saw can cause a derailment, damaging the drive sprocket and chewing up the driver tangs.
DeWalt Model Compatibility and Chain Options Table
DeWalt equips its saws with high-efficiency, low-kickback semi-chisel chains designed to maximize battery life without sacrificing safety. Most factory-installed options are manufactured by Oregon, making direct aftermarket cross-referencing straightforward. Semi-chisel cutters feature rounded corner angles that hold an edge longer when exposed to abrasive softwoods, dirt, or ash, making them ideal for ground clearing and yard maintenance.
If you perform heavy timber cutting or bucking clean hardwood logs, upgrading to a full-chisel profile provides faster cutting speeds. Full-chisel teeth feature square corners that slice wood fibers instantly, though they dull significantly faster if they touch soil. Ensure your powerhead supports full-chisel load; for instance, running aggressive cutters on smaller 20V tools can stall the motor under moderate feed pressure.
| DeWalt Saw Model | Bar Length | chain pitch | Chain Gauge | Drive Links | Standard OEM / Replacement Match |
|---|---|---|---|---|---|
| DCCS620 (20V Max) | 12 Inches | 3/8" LP | .043" (1.1mm) | 45 DL | DeWalt DWA-1120 / Oregon 90PX045G |
| DCCS670 (60V FlexVolt) | 16 Inches | 3/8" LP | .050" (1.3mm) | 56 DL | DeWalt DWA-1160 / Oregon 91PX056G |
| DCCS672 (60V FlexVolt) | 18 Inches | 3/8" LP | .050" (1.3mm) | 62 DL | DeWalt DWA-1180 / Oregon 91PX062G |
| DCCS677 (60V FlexVolt) | 20 Inches | 3/8" LP | .050" (1.3mm) | 70 DL | DeWalt DWA-1200 / Oregon 91PX070G |
Step-by-Step Chain Replacement and Proper Tensioning
Replacing the chain on a DeWalt cordless saw is straightforward, whether your model uses a tool-free tensioning knob or a traditional dual-nut bar clamp. Before performing any maintenance, remove the battery pack to eliminate any possibility of accidental motor engagement. Place the saw on a clean work surface and clear away packed sawdust and oil residue from beneath the sprocket cover.
Loosen the bar retaining nut or tool-free locking dial, then turn the tensioner screw counterclockwise to back the guide bar toward the drive sprocket. Lift the old chain off the bar nose and drive sprocket. Wipe out the guide bar groove using a thin putty knife or groove cleaner, ensuring oil passage holes are free of debris. Position the new chain over the bar, ensuring the cutting edges along the top bar rail face forward (away from the powerhead handle).
Loop the drive links around the drive sprocket, seat the links inside the bar channel, and reattach the side cover finger-tight. Pull the nose of the guide bar upward while tightening the tension adjustment mechanism. Correct tension is reached when you can lift the chain on the underside of the bar and the tops of the drive links remain inside the bar groove without sagging. Tighten the bar nuts securely, reinstall your battery, and verify oil delivery by running the saw near a clean piece of cardboard to check for oil sling.
Chain Maintenance, Sharpening, and Safety Practices
Proper maintenance doubles the operational life of both your chain and guide bar. Always keep your chain oil reservoir filled with high-grade bar and chain oil. Cordless electric saws deliver high torque instantly; running a chain dry will destroy drive link rivet joints and warp your guide bar rails within minutes. Check oil flow regularly during extended cutting sessions.
- File Size Selection: Use a 4.5mm (11/64-inch) round file for .043" gauge narrow-kerf chains, or a 4.0mm (5/32-inch) file for standard .050" gauge 3/8" LP chains.
- Sharpening Angle: Maintain a 30-degree top-plate sharpening angle using a filing guide to keep cuts tracking straight.
- depth gauge Check: Lower depth gauges (rakers) using a flat file and a .025-inch depth gauge tool every 3 to 4 sharpenings.
- Safety Gear: Always wear cut-resistant chainsaw chaps, safety glasses, heavy leather gloves, and steel-toe boots when operating or sharpening saws.
When working on remote properties or cutting clearing zones, carrying a sharp spare chain saves time compared to field-filing. If your cuts begin producing fine sawdust instead of distinct wooden chips, or if the saw pulls aggressively to one side, stop immediately. These symptoms indicate uneven tooth wear or dull edges that force your DeWalt battery to drain rapidly while straining mechanical components.
Clear Recommendation for DeWalt Owners
If you own a DeWalt 20V Max chainsaw (like the DCCS620), stick with an OEM DeWalt DWA-1120 or Oregon 90PX 45-drive link chain in .043" gauge to maximize run time and motor life. For owners of 60V FlexVolt saws (such as the DCCS670 or DCCS672) tackling fallen hardwood limbs or storm cleanup, purchase 3/8" LP .050" gauge semi-chisel replacement loops (56 DL for 16-inch, 62 DL for 18-inch). Your immediate next step should be pulling the battery out of your saw, checking the stamp on your current guide bar, and ordering two matching replacement chains—one to mount on the saw and one to keep sharpened in your kit bag.
Frequently Asked Questions
Can I put a standard Stihl or Husqvarna chain on my DeWalt chainsaw?
Yes, provided the pitch, gauge, and drive link count match your DeWalt guide bar specs exactly. For example, a Stihl Picco Micro 3 chain with 3/8" Low Profile pitch, .050" gauge, and 56 drive links will fit a 16-inch DeWalt 60V chainsaw perfectly.
Why does my new chain dull so quickly on a cordless DeWalt saw?
Fast dulling is usually caused by contacting dirt, rocks, or sand embedded in bark, or from insufficient chain lubrication. Always verify that your auto-oiler is actively discharging oil and that your chain groove is clear of packed sawdust.
How do I know if my DeWalt chain needs to be replaced instead of sharpened?
Replace your chain if cutting teeth are damaged from striking stones or metal, if drive links are cracked or burred, if rivets are loose, or if the teeth have been filed back past the laser-etched wear mark on top of the cutter.
Sources
- DeWalt Official Product Specifications & Manuals
- Oregon Tool Selection & Chain Fitment Guide
- ANSI B175.1 Gasoline- and Electric-Powered Hand-Held Chain Saws Safety Requirements
- OSHA Standard 1910.266 - Logging Operations and Equipment Maintenance