

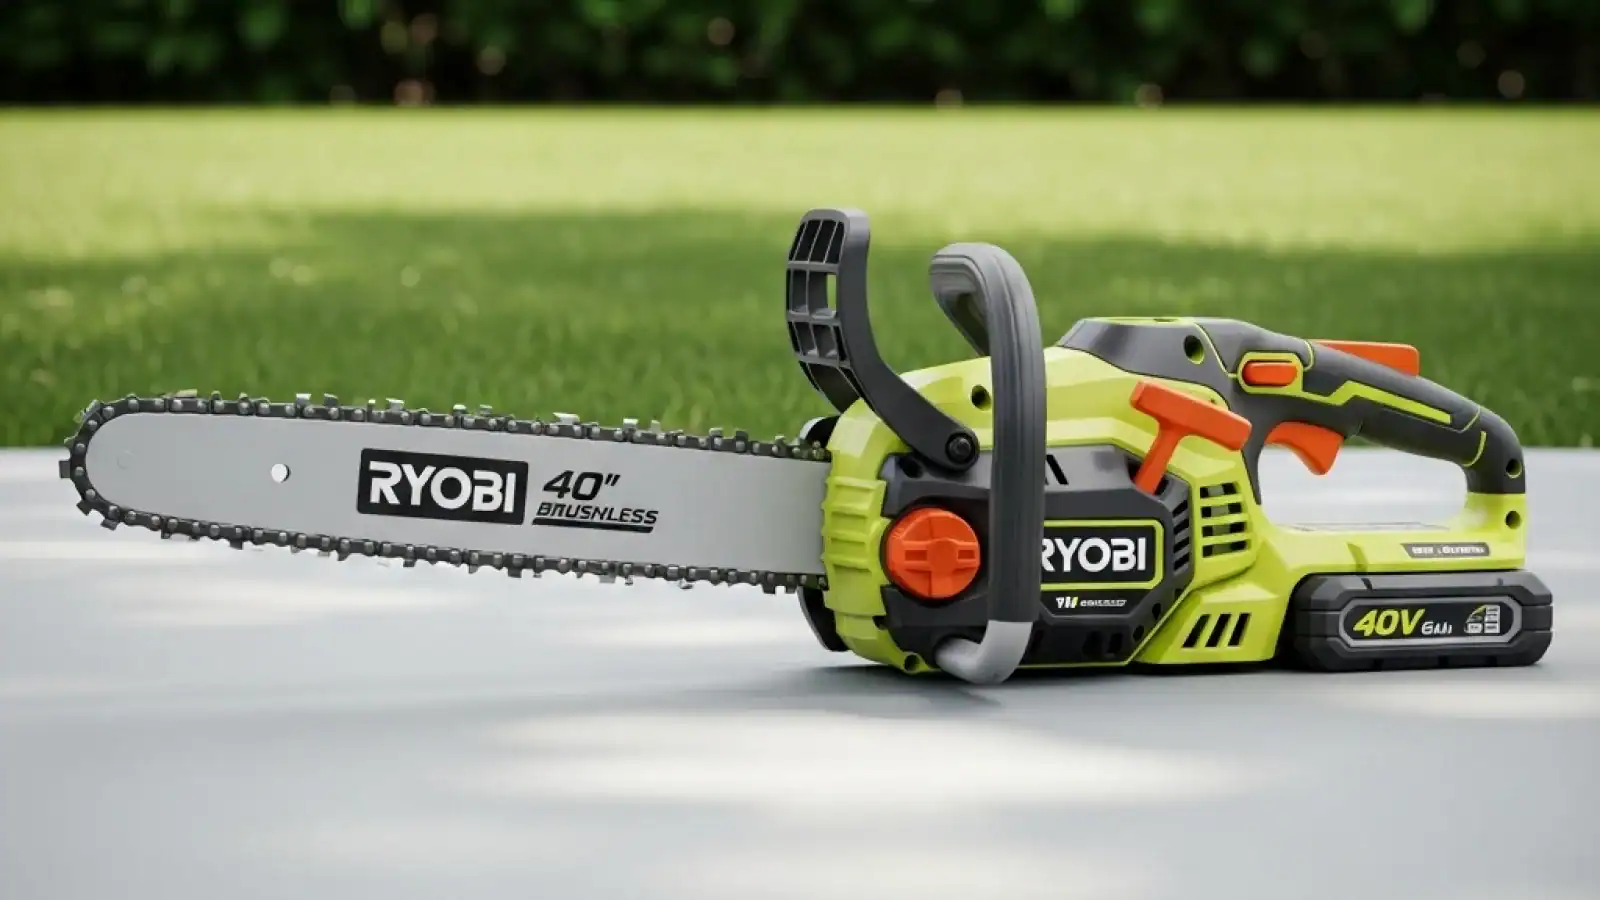

As an experienced outdoor power equipment specialist, I’ve seen countless homeowners, DIY enthusiasts, and even seasoned landowners embrace the convenience and power of Ryobi battery chainsaws. These cordless workhorses, whether from the versatile 18V ONE+ platform or the robust 40V series, have revolutionized how we tackle yard work, logging, and general wood cutting. But just like any precision tool, understanding the fundamentals of its operation and maintenance is key to unlocking its full potential and ensuring your safety. One of the most fundamental, yet often overlooked, aspects of owning a battery-powered chainsaw is knowing precisely how to remove its battery safely and effectively. It’s more than just unplugging; it’s about protecting your investment, prolonging battery life, and most importantly, preventing accidents. So, let’s get into the nitty-gritty of it.
Table Of Content
- Why Proper Battery Handling is Crucial for Your Ryobi Chainsaw’s Health and Your Safety
- The Immediate Safety Imperative
- Extending Battery and Tool Lifespan
- Streamlining Maintenance and Storage
- Essential Preparations Before You Begin
- Gathering Your Gear and Understanding Your Manual
- The Critical First Step: Powering Down
- Step-by-Step Guide to Safely Removing Your Ryobi Chainsaw Battery
- Locating the Release Mechanism
- The Gentle Release and Extraction
- An Expert’s Tip: Inspect and Clean
- Troubleshooting Common Issues During Battery Removal
- When the Battery Just Won’t Budge
- Tackling Corrosion and Debris
- Troubleshooting Common Battery Removal Issues
- Recognizing and Addressing a Damaged Battery
- Post-Removal Care and Long-Term Battery Health
- Optimal Storage for Your Ryobi Battery
- Maintaining Your Chainsaw Without the Battery
- General Battery Safety Best Practices
Why Proper Battery Handling is Crucial for Your Ryobi Chainsaw’s Health and Your Safety
You might think removing a battery is straightforward, and often it is. However, overlooking the ‘why’ behind proper removal can lead to significant issues. From accidental starts to premature battery degradation, understanding the importance of this simple act is paramount for every Ryobi chainsaw owner.
The Immediate Safety Imperative
Imagine a scenario: you’ve just finished a cut, set the chainsaw down for a moment, and then, without warning, the chain spins to life. This isn’t a hypothetical fear; it’s a genuine risk if the battery remains connected to your chainsaw while unattended or during maintenance. Removing the battery immediately de-energizes the tool, eliminating any possibility of accidental activation, which can cause severe injuries. According to the Centers for Disease Control and Prevention (CDC), chainsaw injuries result in approximately 36,000 emergency room visits annually in the U.S. Many of these incidents could be prevented by simply de-energizing the tool.
Furthermore, taking out the battery creates a clear “safe state” for your chainsaw. When you’re cleaning the chain, sharpening the teeth, or performing any inspection, knowing there’s no power source connected provides peace of mind. It’s a foundational safety practice, much like unplugging any corded power tool before adjusting or maintaining it. Always treat a battery-powered chainsaw with the same respect you’d give a gas-powered one – assume it could start until you’ve actively made it safe.
Extending Battery and Tool Lifespan
Modern Ryobi Lithium-ion batteries are incredibly advanced, featuring intelligent circuit boards that manage charge and discharge cycles. However, even these smart batteries benefit from proper handling. Leaving a battery in the chainsaw during long-term storage can lead to a phenomenon known as “parasitic drain.” Even when the tool is off, tiny amounts of current can be drawn, slowly discharging the battery. Over time, this can lead to a deep discharge, which significantly reduces the battery’s overall capacity and lifespan.
Beyond parasitic drain, removing the battery protects it from environmental factors. Extreme temperatures, whether scorching summer heat in a shed or freezing winter cold in a garage, can severely degrade battery performance and capacity. A detached battery can be stored in an optimal environment—a cool, dry place—away from the tool, away from direct sunlight, and away from moisture. This simple step can add years to the life of your expensive Ryobi 40V or 18V ONE+ batteries, saving you money in the long run.
Streamlining Maintenance and Storage
When the battery is removed, inspecting and cleaning the battery compartment of your chainsaw becomes much easier. Sawdust, sap, and other debris can accumulate in this area, potentially interfering with electrical contacts or causing overheating. A quick wipe-down after each use, with the battery out, ensures these contacts remain clean and efficient, guaranteeing a reliable connection every time you power up your tool. This also prevents corrosion on the terminals, a common culprit for power issues.
For seasonal storage, removing the battery is non-negotiable. It allows for thorough cleaning of both the chainsaw and the battery, and ensures each component is stored under ideal conditions. For example, a Ryobi 40V HP Brushless chainsaw, designed for heavy-duty tasks, benefits immensely from this practice, as its advanced electronics are protected from potential moisture ingress or terminal corrosion during prolonged downtime. Proper storage ensures your tool is ready to go when spring rolls around again.
Essential Preparations Before You Begin
Before you even think about touching that battery release button, a few critical steps will ensure the process is safe, efficient, and damage-free. Think of it as setting the stage for a successful operation – a crucial habit for anyone operating powerful outdoor equipment.
Gathering Your Gear and Understanding Your Manual
While removing a battery doesn’t require a full toolkit, having some basic items on hand can be beneficial. Always wear safety glasses, as debris or even a rare battery acid leak (though uncommon with modern Li-ion) could pose a risk. A pair of work gloves is also advisable, offering better grip and protection. Keep a clean, dry cloth nearby for wiping down terminals or the battery compartment once the battery is out.
Most importantly, take a few moments to consult your Ryobi chainsaw’s user manual. While the general procedure is similar across models like the Ryobi 18V ONE+ HP Brushless 10-inch Pruning Chainsaw or the robust 40V HP Brushless 18-inch Chainsaw, there might be subtle differences in button placement, locking mechanisms, or specific warnings. The manual is your ultimate guide and often contains illustrations specific to your model. Trust me, a minute spent with the manual can save you hours of frustration or potential damage.
The Critical First Step: Powering Down
This might sound obvious, but it’s a step that’s often rushed or overlooked in the excitement or haste of a project. Before attempting to remove the battery, ensure your Ryobi chainsaw is completely powered off. This means the trigger is released, the chain brake is engaged (if applicable), and any safety switches are in the ‘off’ position. For most battery chainsaws, simply releasing the trigger and ensuring the motor has stopped spinning is sufficient, but double-checking all controls reinforces good safety habits.
Visually confirm that the chain is completely stationary and that the power indicator light (if your model has one) is off. Never try to remove the battery while the motor is still winding down or the chain is in motion. This immediate de-energization is your primary defense against unintended starts and is the single most important safety measure you can take before handling the battery.
Step-by-Step Guide to Safely Removing Your Ryobi Chainsaw Battery
Now that we’ve covered the crucial preparation, let’s walk through the actual process of removing your Ryobi battery. It’s a simple operation, but precision and gentleness are key.
Locating the Release Mechanism
Ryobi designs its battery systems for user-friendly operation. Most Ryobi battery chainsaws, whether they’re 18V ONE+ or 40V, utilize a quick-release button or a set of buttons. These are typically located on the battery itself or on the tool’s battery receptacle, often near the base of the handle or where the battery slides into the tool.
For Ryobi’s 18V ONE+ system, you’ll usually find two side-release buttons that need to be squeezed simultaneously. For the larger 40V batteries, it’s often a single, prominent push-button located on the top or front of the battery itself, designed for easy access. Take a moment to visually locate these buttons. They are often textured or colored differently to stand out.
The Gentle Release and Extraction
Once you’ve located the release mechanism, the removal process is straightforward. Here’s a step-by-step breakdown:
- Ensure the Chainsaw is Off: Double-check that the trigger is released and the chain is completely still. Engage the chain brake for added security.
- Stabilize the Chainsaw: Place the chainsaw on a flat, stable surface, like a workbench, ensuring it won’t tip over. Hold it securely with one hand, or brace it against your body if working in the field.
- Locate and Press the Release Button(s): With your free hand, firmly press and hold down the battery release button(s). For 18V batteries, this means squeezing both side tabs. For 40V batteries, it’s typically a single, central button.
- Gently Pull the Battery Out: While holding the release button(s), gently pull the battery straight out of its compartment. Avoid twisting or forcing the battery. It should slide out smoothly with minimal resistance. If it feels stuck, do not apply excessive force – refer to the troubleshooting section below.
- Set the Battery Aside Safely: Once removed, place the battery on a clean, dry surface, away from any metal objects that could potentially short the terminals.
This systematic approach ensures that you maintain control over the tool and the battery throughout the process, minimizing any risk of damage or injury. The key takeaway here is ‘gentle but firm’ – the battery is designed to be easily removable, so excessive force is almost never required.
An Expert’s Tip: Inspect and Clean
Once the battery is out, take a moment to quickly inspect both the battery terminals and the chainsaw’s battery receptacle. Look for any accumulated sawdust, dirt, moisture, or early signs of corrosion. Even small amounts of debris can lead to poor electrical contact, reduced power, or even overheating. Use your clean, dry cloth to wipe away any visible contaminants. For more stubborn grime or sap, a slightly damp cloth followed by immediate drying can work wonders. This quick inspection after every removal is a habit that will significantly contribute to the longevity and reliability of both your Ryobi chainsaw and its batteries.
Troubleshooting Common Issues During Battery Removal
While battery removal is generally smooth, every now and then, you might encounter a snag. Don’t panic! Most common issues are easily resolved with a little patience and the right approach. From my years in the field, I’ve seen these problems countless times.
When the Battery Just Won’t Budge
A stuck battery is perhaps the most common challenge. This can happen for several reasons: perhaps the release button isn’t fully depressed, debris has lodged itself between the battery and the tool, or over time, a slight accumulation of dirt and grit has created friction. Before you try anything drastic, re-check that the release button(s) are pressed completely and held down. Sometimes, a full depression is all it takes.
If the button is fully pressed and the battery still won’t move, try gently wiggling the battery side-to-side or up-and-down while simultaneously pulling it out. The emphasis here is on “gently.” Excessive force can damage the battery housing, the tool’s receptacle, or even lead to internal damage to the battery cells. Remember the story of my client, John, who almost ruined his Ryobi 40V battery by trying to force it out when it was merely caked with sap. Patience is your friend here.
Tackling Corrosion and Debris
Corrosion on battery terminals often appears as a powdery, greenish-blue, or white residue. This is usually caused by moisture exposure or minor chemical reactions over time. If you spot corrosion, it’s crucial to address it immediately, as it can impede electrical flow and eventually damage both the battery and the tool. Similarly, sawdust and other organic debris can pack into tight spaces, making removal difficult.
To clean corroded terminals, first ensure the battery is completely disconnected from the tool. You can create a paste using a small amount of baking soda and water. Apply this paste to the corroded areas with a cotton swab or a soft brush (an old toothbrush works great). Gently scrub until the corrosion is removed. The baking soda neutralizes any acid. After cleaning, wipe the terminals thoroughly with a clean, damp cloth, and then immediately dry them completely with a dry cloth or allow them to air dry for an extended period. Ensure there is absolutely no moisture remaining before reinserting the battery or connecting it to a charger. For stubborn debris, a blast of compressed air can also be very effective.
Troubleshooting Common Battery Removal Issues
Here’s a quick reference table for common problems and their solutions:
| Issue | Likely Cause | Recommended Solution |
|---|---|---|
| Battery Won’t Release | Release button not fully pressed | Ensure button(s) are pressed firmly and completely. |
| Battery is Stuck/Tight | Debris, sap, minor swelling, friction | Gently wiggle while pulling; inspect for debris upon partial removal. NEVER force it. |
| Corrosion on Terminals | Moisture exposure, chemical reaction | Clean with baking soda paste and a soft brush; dry thoroughly. |
| Unusual Resistance/Clicking | Misalignment or internal obstruction | Inspect the tool’s battery slot and battery for foreign objects; consult manual. |
| Battery feels hot or looks swollen | Internal damage, overcharge, defect | Immediately stop use. Do NOT attempt to force. Safely dispose of at a certified recycling center. |
Recognizing and Addressing a Damaged Battery
Sometimes, a battery isn’t just stuck; it’s genuinely damaged. Signs of a damaged Ryobi battery include visible cracks in the casing, leaking fluid, significant swelling or bulging, or if it feels unusually hot to the touch even after brief use. If you observe any of these symptoms, do NOT attempt to force the battery out or use it further. A damaged Lithium-ion battery can be a fire hazard. Carefully try to remove it following the gentle steps. If it’s truly stuck due to swelling, it’s safer to take the entire tool and battery to an authorized Ryobi service center or a certified battery recycling facility. Always dispose of damaged batteries responsibly, following local regulations, as they contain hazardous materials.
Post-Removal Care and Long-Term Battery Health
Removing the battery is only half the battle. What you do with the battery and the chainsaw afterward is equally important for their long-term health and your safety. Think of this as the wrap-up of a successful operation, ensuring everything is ready for next time.
Optimal Storage for Your Ryobi Battery
The way you store your Ryobi battery significantly impacts its lifespan. For optimal performance and longevity, always store your Lithium-ion batteries in a cool, dry place. Ideal temperatures typically range between 50°F and 80°F (10°C and 27°C). Avoid storing batteries in direct sunlight, in uninsulated sheds where temperatures can fluctuate wildly, or in areas prone to dampness. Never store them where they could be exposed to freezing temperatures or excessive heat.
Furthermore, it’s generally recommended to store Lithium-ion batteries at approximately a 50-70% charge level for extended periods. This prevents the stress of being fully charged for long durations and avoids the damaging effects of deep discharge. Ryobi’s intelligent chargers often have a ‘storage mode’ or will stop charging at an optimal level, but always check your specific battery and charger manual for the best practice. Keep the battery separate from the tool to prevent any accidental drain or connection issues, and away from any conductive materials that could bridge the terminals.
Maintaining Your Chainsaw Without the Battery
With the battery safely removed and stored, this is the perfect opportunity to give your Ryobi chainsaw a thorough cleaning and inspection. Start by cleaning the battery compartment itself, ensuring no sawdust or debris remains that could interfere with future battery connections. Use a dry brush or compressed air for this. Then, move on to the rest of the chainsaw.
Inspect the guide bar for wear, burrs, and ensure the oiling holes are clear. Check the chain for sharpness, tension, and any damage. A dull chain makes cutting inefficient and dangerous, increasing kickback risk. Clean out the chain brake mechanism and inspect the air filter (if accessible on your electric model). Even battery chainsaws, like the Ryobi 40V HP Brushless models, benefit from regular attention to their cutting components. A clean, well-maintained tool, stored without its power source, is a safe and reliable tool that will serve you faithfully for years.
General Battery Safety Best Practices
Beyond removal and storage, there are a few general safety practices that every Ryobi battery chainsaw user should internalize. Never attempt to modify your battery or charger. Always use only Ryobi-approved batteries and chargers specifically designed for your tool. Avoid dropping batteries or subjecting them to strong impacts, as this can cause internal damage not visible from the outside. If a battery is damaged, as discussed, dispose of it responsibly through proper channels, often local recycling centers that handle hazardous waste or specialized battery recycling programs.
Regularly inspect your batteries for any signs of wear, damage, or overheating. By treating your Ryobi batteries with the care they deserve, you not only extend their life but also ensure a safer, more efficient experience every time you step out to tackle your wood-cutting tasks. Remember, your tools are an investment, and proper care is the best return you can get.