Quick answer: To select the correct replacement parts for a Remington chainsaw, verify the exact model number and production year on the saw's data plate, then cross-reference part numbers for engine ignition, drive sprockets, or bar specifications. Modern remington gas chainsaws typically use a 3/8-inch Low Profile (LP) chain pitch with a .050-inch gauge, while vintage models may utilize standard 3/8-inch or .325-inch drive setups. Always check bar length, drive link count, and drive case layouts against official schematic diagrams before purchasing.
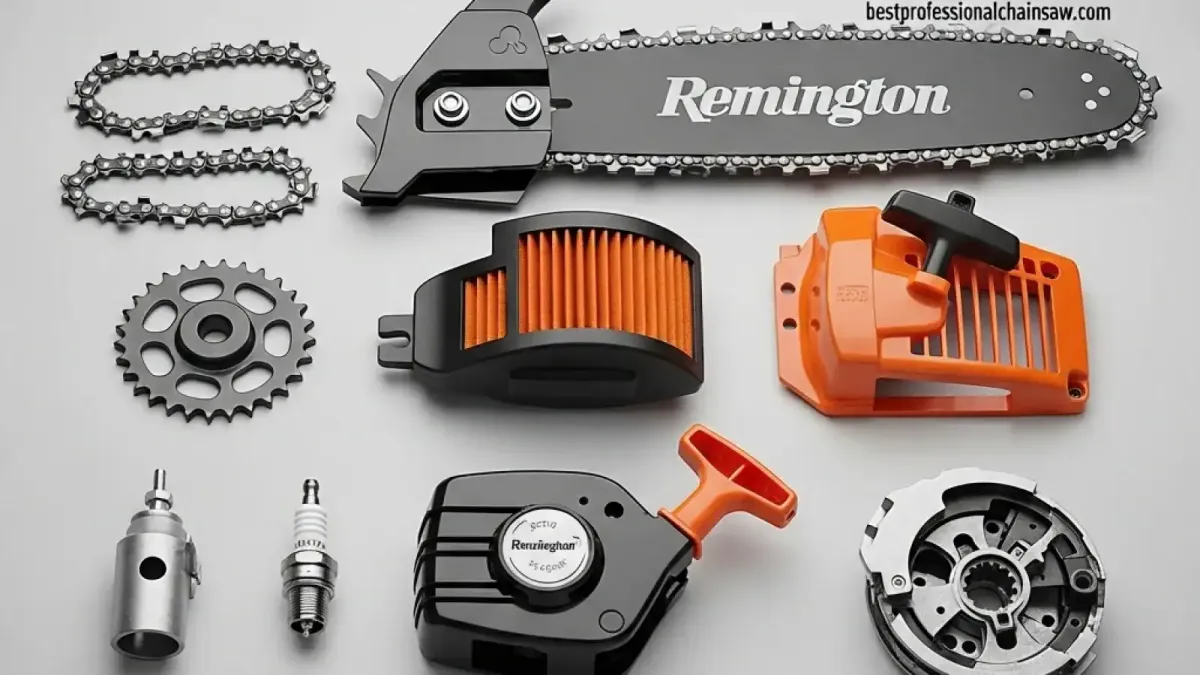
Understanding the Complete Remington Chainsaw Parts List
Maintaining a Remington chainsaw effectively relies on breaking the machine down into its primary functional systems: engine or motor internals, drive assembly, cutting chain system, and safety mechanics. remington saws—manufactured over the years under MTD Products and outdoor equipment groups—utilize standardized parts for common wearable items like filters, drive sprockets, and spark plugs. However, internal engine castings, carburetors, and recoil starters vary significantly depending on whether you operate a 2-stroke gas engine (ranging from 38cc to 46cc) or a 12-amp electric model.
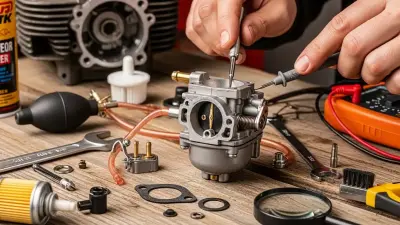
When sourcing engine replacement components, fuel system maintenance remains the most common service area. Modern gas units rely on diaphragm carburetors (often sourced from Walbro or Zama) sensitive to ethanol blend degradation. A typical overhaul kit includes metering diaphragms, internal mesh screens, needle valves, and primer bulb assemblies. Replacing standard clear vinyl fuel lines with 3/32-inch ID by 3/16-inch OD Tygon tubing ensures maximum chemical resistance against modern pump fuels, preventing air leaks that cause lean running conditions and engine overheating.
The ignition and electrical hardware on Remington units must maintain clean electrical pathways to fire consistently. Small-engine models generally require a resistor spark plug gapped to exactly .025 inches (0.635 mm) paired with a solid-state ignition module set to an air gap of .012 to .015 inches off the flywheel magnet. Beyond the engine, structural items such as replacement anti-vibration rubber isolation mounts, throttle lockout linkages, and front handle wraps preserve operator comfort and precise tool control during heavy bucking tasks.
Pro tip: When replacing a Remington chainsaw chain or sprocket on an older gas saw, always count the exact number of drive links rather than relying solely on the printed bar length. A standard 18-inch bar on an RM4218 model typically takes a 62-drive-link chain with a 3/8-inch LP pitch and .050-inch gauge, but aftermarket replacement bars often shift this count to 63 or 64 links. Running a chain with even one extra link prevents the chain tensioner screw from taking up Slack, leaving the chain sagging hazardously on the bottom groove.
Deciphering Remington Parts Diagrams and Schematics
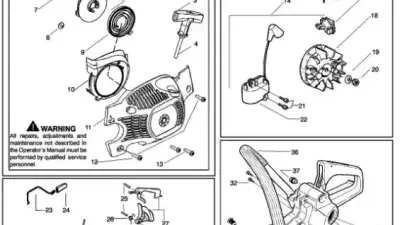
Exploded schematic diagrams are vital resources when performing complete teardowns or ordering hard-to-find internal hardware. A typical diagram breaks down the assembly into sub-groups: housing and handles, engine cylinder and crankcase, fuel tank and lines, air cleaner and carburetor, and the oil pump mechanism. Reading these schematics accurately allows you to identify part numbers down to specific thrust washers, needle bearings, and circlips securing the clutch drum.
Vintage gas chainsaws, particularly legacy models manufactured prior to the early 2000s, present unique challenges due to part number supersessions. As manufacturing rights changed hands, original part numbers were often updated to newer MTD cross-references. When reviewing an old schematic, look for the official model designation on the crankcase tag—such as the Mighty Mite, Pro 88, or Outlaw series—rather than relying on cosmetic top-cover labels. Cross-referencing modern part numbers with older schematics ensures smooth fitment without needing custom modifications.
For electric pole saws and corded hand saws like the Remington Branch Wizard or Ranger series, diagrams focus heavily on motor brushes, internal nylon gearing, and tensioning hardware. Electric models use direct drive or planetary gear reductions. If the saw chain stops turning while the motor hums, examining the drive gear schematic usually reveals a stripped main drive gear or a worn drive coupler—inexpensive parts that are easy to swap out once identified on an exploded view.
Cutting System Specifications: Bars, Chains, and Sprockets
Selecting the correct cutting equipment requires matching three vital dimensions: pitch, gauge, and drive link count. Pitch is the average distance between any three consecutive rivets divided by two (most common on Remington residential saws is 3/8-inch Low Profile). Gauge represents the thickness of the drive link where it slips into the guide bar groove, typically .050 inches for standard North American homeowner models. Installing a .058-inch gauge chain into a .050-inch guide bar will cause binding and immediate chain lockup, while a .050-inch chain in a .058-inch bar will wobble, cutting erratic curves and wearing out the bar rails prematurely.
Proper lubrication is essential for prolonging bar and chain lifespan. Remington saws utilize either automatic gear-driven oil pumps or manual push-button oilers on entry-level electric models. Automatic oiler systems draw petroleum-based bar oil through an internal pickup screen and force it through a small orifice lined up with the guide bar inlet hole. If your chain runs dry, inspect the tiny oil inlet port near the mounting studs; this hole frequently clogs with fine saw dust mixed with tacky bar oil resin.
To safely select cutting attachments and replacement service items across common Remington configurations, refer to the technical specs detailed in the standard compatibility reference below:
| Saw Type / Model Range | Engine / Motor Spec | Bar Length | Chain Pitch & Gauge | Fuel/Oil Requirements |
|---|---|---|---|---|
| Gas Residential (e.g., RM4218) | 42cc 2-Stroke Gas | 14" – 18" | 3/8" LP Pitch, .050" Gauge | 50:1 Gas/Oil (2-Stroke Synthetic) |
| Gas Heavy Duty (e.g., RM4618) | 46cc 2-Stroke Gas | 18" – 20" | .325" or 3/8" LP, .050" Gauge | 50:1 Gas/Oil Mix + High-Tack Bar Oil |
| Electric Pole Saw (e.g., Ranger) | 8.0A – 10A 120V Electric | 8" – 10" | 3/8" LP Pitch, .050" Gauge | Automatic Oiler (Bar Oil Only) |
| Legacy Vintage Saws (Pre-2000s) | 35cc – 55cc Gas | 12" – 20" | 3/8" Standard or .325", .050" Gauge | 40:1 or 32:1 Mix (Check Tag) |
| Part Type | Modern Models | Old Models | Pole Saw Models |
|---|---|---|---|
| Remington chainsaw chain | Standard sizes | May require custom fitting | Smaller chains |
| Guide Bar | Lightweight | Heavier steel | Compact |
| Carburetor | Easy to replace | Harder to source | Electric motor |
| Oil Pump | Standard design | May differ | Simplified |
| Handles | Ergonomic | Classic design | Extended pole |
Maintaining Remington Pole Saw Parts and Accessories
Remington's extended pole saws, such as the Pole Saw Express and Sub-Sero models, use specialized drive assemblies engineered to transmit torque up an aluminum or fiberglass shaft. Key components requiring routine maintenance include internal driveshafts, telescoping coupler locks, upper aluminum gearboxes, and specialized compact guide bars ranging from 8 to 10 inches. Because pole saws operate at steep overhead angles, maintaining proper chain tension and gear case lubrication is critical to prevent dangerous chain derailment overhead.
Drive shafts on pole saws are subject to torsional stress during extended limbing sessions. Over time, the splined ends of the inner drive cable or multi-tooth shaft can round off if lock knobs are left loose during operation. When replacing pole saw parts, always inspect the internal coupling sleeve for grooving or metal shavings. Replacing worn rubber couplings alongside new drive shafts ensures smooth power delivery and dampens vibrations before they reach your hand grips.
For electric pole saw models, pay close attention to the lock-switch assemblies and heavy-duty power cords. Pole trimming subjects electrical wiring to severe strain, branch snags, and moisture from damp wood sap. Checking cord strain reliefs, trigger lockouts, and switch contacts ensures reliable power delivery while keeping safe operation intact during overhead limb work.
Troubleshooting and Sourcing Replacement Hardware
When searching for replacement parts for discontinued or modern Remington tools, know which components are standardized small-engine hardware and which are model-specific castings. Standardized parts include spark plugs (such as NGK BPMR7A or Champion RCJ7Y), fuel line tubing, starter rope, and bar mounting nuts. Model-specific parts—including ignition coils, flywheels, recoil starter pulleys, and brake bands—must match your saw's specific sub-series number, which is typically found on the serial sticker located under the rear handle or near the oil tank cap.
Systematic maintenance prevents unexpected breakdown mid-job. Clean or replace the foam/felt air filter every 10 hours of operation; run a small pick through the bar oil groove; flush out old fuel before seasonal storage; and inspect anti-vibration mounts for cracking or soft spots caused by oil exposure. Keeping a small inventory of wear items—a spare spark plug, an extra low-kickback chain, a replacement drive rim or spur sprocket, and fresh pull-rope cord—ensures quick repairs on job sites without frustrating delays.
Proper safe operation depends directly on fully functional hardware. Always verify that safety features like the centrifugal clutch and front chain brake work correctly before starting work. The clutch should release cleanly at idle (around 2,800 to 3,200 RPM), keeping the chain stationary until you press the throttle trigger. If the chain moves continuously while idling, worn clutch springs or a stuck needle bearing need immediate service or replacement.
For homeowners aiming to keep a reliable cutting setup, verify your saw's exact engine displacement and bar measurements first. Ordering high-quality replacement parts—specifically correct-spec guide bars, matched pitch chains, and clean fuel delivery filters—is the single best step to maintain peak cutting efficiency and keep your equipment running safely year after year.
Frequently Asked Questions
Where can I find the exact model number on my Remington chainsaw?
The model number and serial number are printed on a metallic tag or durable sticker attached to the chainsaw body. On most gas models, this tag is located near the bottom of the crankcase or under the rear handle guard. On electric pole saws, it is usually stamped into the motor housing plastic.
Can I put a larger bar and chain on my Remington gas chainsaw?
While you can physically mount different bar lengths, you should never exceed the manufacturer's recommended bar length range (typically up to 18 inches on 42cc models). Oversized bars overload the centrifugal clutch and oil pump, strain the engine, and increase kickback risks without offering practical performance benefits.
Why is my Remington pole saw not oiling the bar and chain?
Dry chains are usually caused by a blocked bar oil inlet hole, a clogged oil tank pickup filter, or solidified bar oil inside the delivery passages. Clean out the bar rail groove with a putty knife or rail cleaner, inspect the small oil hole near the bar mounting slot, and clear out any built-up wood flour or resin paste.
Are parts interchangeable between MTD and Remington chainsaws?
Yes, many modern Remington models share identical designs and part numbers with MTD, Troy-Bilt, and Craftsman units built on the same manufacturing platforms. Always cross-reference the official 9-digit or 11-digit OEM part number from the schematic to verify fitment across brands.
Sources
- OSHA Standard 1910.266 - Logging Operations & Chainsaw Safety Requirements
- Wikipedia - Chainsaw Mechanics, Chains, and Safety Systems
- ANSI B175.1 - American National Standard for Power Tools - Gasoline-Powered Chain Saws Safety Requirements