Electric outdoor power equipment has transformed home woodcutting, making light yard maintenance faster, cleaner, and significantly quieter than ever before. If you are searching for a dependable, budget-friendly yard tool, a Remington saw offers a practical alternative to heavy gas-powered units without requiring complex engine tuning or fuel mixing. Over decades of field use, Remington has built a reputation for accessible home saws designed specifically for cleanup tasks, storm response, and seasonal firewood prep.
Quick answer: A Remington electric saw provides lightweight, budget-friendly cutting performance perfect for home trimming, limb clearing, and light firewood processing. Models featuring 14-inch to 16-inch guide bars run on standard 12A to 15A electrical currents, giving homeowners instant starting power, simple chain tension adjustments, and low maintenance requirements compared to gas models.
Understanding the Remington Saw Lineup
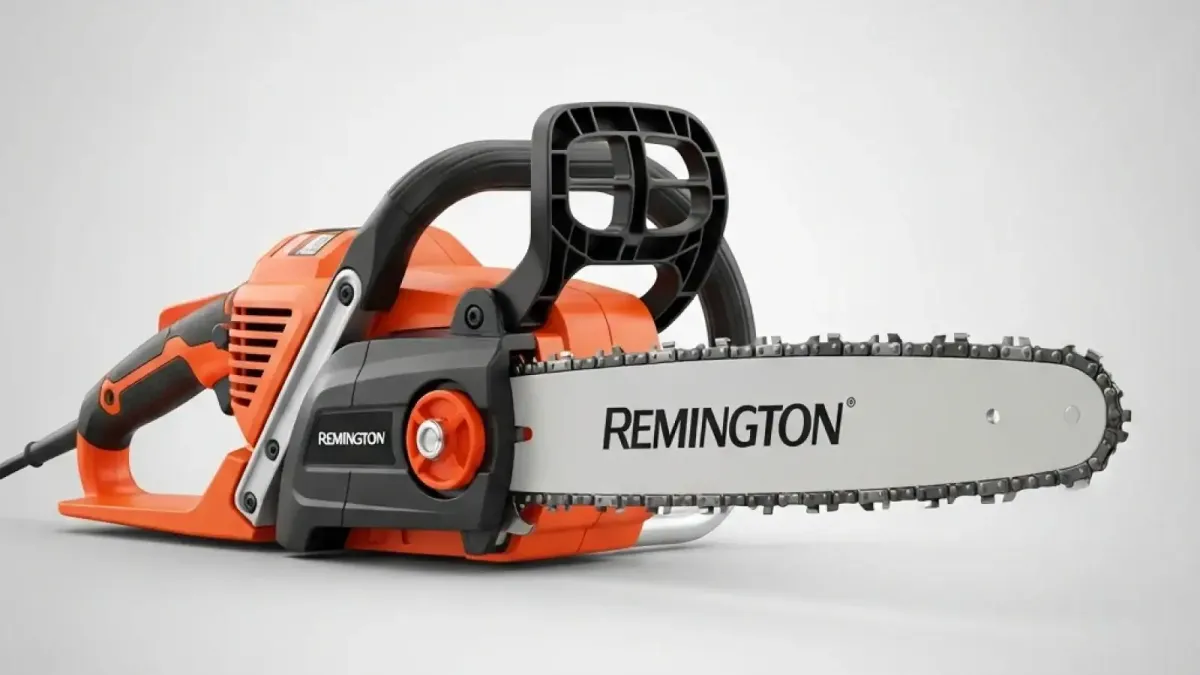
The Remington saw lineup centers primarily on user accessibility and consistent electrical power output. Whether equipped with a corded 12-Amp motor or a larger 15-Amp power plant, these electric models deliver immediate torque the moment you pull the trigger. Unlike gas chainsaws that rely on a clutch engaging at specific RPM thresholds, an electric Remington saw spins up straight away, minimizing hesitation during quick limbing jobs around your property.
Homeowners generally choose between two core sizes: the 14-inch model for fine pruning and small brush, and the 16-inch model for thicker fallen limbs and backyard firewood cutting. The 14-inch variant typically weighs under 9 pounds, reducing wrist fatigue when working at shoulder height or clearing dense hedge growth. The 16-inch option adds a bit more stability and cutting depth, allowing you to slice through logs up to 14 inches in diameter in a single pass.
Every corded Remington electric chainsaw utilizes standard 120V household current, meaning runtime is practically infinite as long as you maintain a secure extension cord setup. For optimal power transfer over distance, pair your saw with a heavy-duty 12-gauge or 14-gauge extension cord rated for outdoor use. Avoid thin 16-gauge light-duty cords, as high electrical resistance can starve the motor of voltage, causing thermal overload switches to trip or risking premature motor winding failure.
Remington Electric Chainsaw Models & Technical Specifications
Matching the right tool to your specific yard demands requires checking key specs like motor amperage, bar length, pitch, and chain gauge. Remington designs their electric range around low-profile cut styles that prioritize safety and ease of control for non-professional users. Below is a direct comparison of the key specifications across popular Remington electric models.
| Model Feature | Remington 14-Inch Electric | Remington 16-Inch Electric |
|---|---|---|
| Motor Amperage | 12.0 Amps | 15.0 Amps |
| Bar Length | 14 Inches (35 cm) | 16 Inches (40 cm) |
| Chain Pitch / Gauge | 3/8" Low Profile / .050" | 3/8" Low Profile / .050" |
| Drive Links | 52 Links | 56 Links |
| Oiling System | Automatic / Manual Push-Button | Automatic Gear-Driven Pump |
| Weight (Bare Tool) | 8.2 lbs (3.7 kg) | 9.8 lbs (4.4 kg) |
Understanding these figures helps when ordering replacement bars or sharp cutters down the road. Both models share a 3/8-inch Low Profile (LP) chain pitch with a .050-inch drive link gauge. This standardized sizing makes finding high-quality replacement chain loops simple, whether you prefer original equipment manufacturer (OEM) replacements or aftermarket options from reputable saw chain manufacturers.
Chain Replacement and Proper Tensioning Guide
Over time, normal friction and timber density cause any chain to stretch and dull. Operating a Remington saw with a loose or blunt chain dramatically increases cutting vibration, slows work speed, and increases kickback risks. Replacing or adjusting your cutting loop on an electric model takes only a few minutes when following correct service protocols.
Pro tip: New electric chainsaw chains stretch rapidly during their first 5 to 10 minutes of cutting. Always adjust tension when the bar is completely cool, then make small adjustments after your first few test passes. Never tighten a hot chain; as the steel cools and contracts, it can exert extreme force on the drive sprocket bearings and guide bar nose wheel, leading to binding or severe mechanical wear.
To safely perform a chain replacement on your saw:
- Disconnect Power: Completely unplug the saw from your outdoor extension cord to eliminate any chance of accidental motor engagement.
- Remove the Side Housing: Loosen the bar retention nuts or turn the tool-less side cover knob counterclockwise to remove the side plate.
- Clean the Drive Pocket: Brush away accumulated sawdust, wood chips, and dried tacky bar oil from inside the sprocket housing and oil exit port.
- Fit the New Chain: Wrap the new chain around the drive sprocket and seat the drive links inside the guide bar groove, ensuring the sharp cutting edges along the top of the bar point forward (away from the motor housing).
- Set Proper Tension: Reinstall the side cover finger-tight. Rotate the tension screw until the middle of the chain snuggly contacts the underside of the guide bar. You should be able to pull the chain down from the bar rail to reveal the full drive link tang, but it should snap back flat against the bar when released.
- Lock Down: Securely tighten the bar cover nuts or locking dial while lifting the nose of the guide bar slightly upward.
Maintaining Bar Oil and Replacement Parts
Proper lubrication is critical for any corded electric chainsaw. The high chain speeds generated by an electric motor generate friction between the steel drive links and the aluminum or laminated bar rails. Using dedicated bar and chain oil prevents rapid heat buildup, chain stretch, and premature bar grooving.
Always fill your oil reservoir with a clean, high-tack bar oil before starting work. In emergency situations during summer months, SAE 30 weight motor oil can serve as a short-term lubricant, but true bar oil contains tackifier additives that prevent oil from flinging off the nose of the bar at high velocity. Keep an eye on the clear oil sight glass on the side of your Remington saw housing. A helpful habit is checking and topping off the oil reservoir every time you take a short rest break.
When maintaining older equipment, keeping track of genuine wear parts extends tool lifespans substantially. Common replacement components include:
- Guide Bars: Replace your guide bar if the side rails show uneven height, wide grooves that allow the chain to tilt, or a pinched nose wheel sprocket.
- Drive Sprockets: Inspect the drive gear behind the side cover for deep wear grooves carved by drive link tangs. Replacing the sprocket every two chain changes protects new chains from premature wear.
- Carbon Brushes: If the motor begins sparking heavily or hesitates under load, replacing the internal carbon motor brushes restores clean electrical conductivity.
Safety Equipment and Smart Cutting Techniques
Although electric saws cut down on noise and exhaust fumes, they clear wood with substantial force. Respecting proper wood-cutting safety protocols is mandatory every time you plug in your saw. Always wear personal protective equipment (PPE), including impact-rated safety glasses with side shields, heavy leather work gloves, non-slip steel-toe boots, and chainsaw chaps made from high-tenacity cut-retardant fibers.
When cutting limbs or thick timber on the ground, avoid letting the tip or upper nose of the guide bar contact neighboring branches, soil, or hidden metal fencing. Contact at the upper quadrant of the bar nose triggers kickback—a sudden, rapid upward and backward thrust of the saw toward the operator. Maintain a firm, two-handed grip on the saw handles, keeping your left thumb wrapped around the front handlebar at all times.
Clear your workspace of tripping hazards and establish a clear footing before starting cut operations. Keep your extension cord trailing behind your body, positioned away from the cutting path to prevent slicing through live electrical lines. If you are clearing thick growth, check out our guide on essential chainsaw parts and accessories to keep your gear working safely and efficiently.
Choosing the Right Remington Electric Saw for Your Property
Selecting the ideal model comes down to wood density, working radius, and personal comfort with tool weight. For light urban yard maintenance, suburban hedge clearing, and trimming overhead branches, a 14-inch 12-Amp Remington model offers maximum maneuverability and lowest physical effort. Its lightweight construction allows for precise cuts without causing arm strain during extended cleanup sessions.
If you regularly deal with larger blowdown from seasonal storms, clear thicker hardwoods, or cut small cords of oak and maple for a backyard fire pit, step up to a 16-inch 15-Amp model. The additional electric motor torque maintains chain speed under load, preventing motor stall when burying the bar full-depth into dense green wood.
Whichever option fits your yard maintenance routine, proper care, constant bar oil monitoring, and correct tensioning ensure your tool delivers reliable service season after season.
Frequently Asked Questions
Can I use regular motor oil in my Remington electric chainsaw?
While standard SAE 30 motor oil can work in a temporary pinch during warm weather, dedicated bar and chain oil is strongly recommended. True bar oil contains special tackifier additives that help the lubricant stick to the high-speed rotating chain rather than slinging off, ensuring optimal bar and chain protection.
What type of extension cord should I use with a Remington saw?
You should use a heavy-duty, grounded 3-prong outdoor extension cord. For runs up to 50 feet, a 14-gauge (AWG) wire cord is sufficient. If you are working up to 100 feet away from an outlet, use a 12-gauge cord to prevent voltage drops that can overheat the motor.
Why does my chain keep coming loose while cutting?
New saw chains stretch naturally during initial heat cycles and require frequent adjustment early in their lifespan. Additionally, if the side cover nuts or tension lock knob are not fully tightened while pulling upward on the bar nose during adjustment, cutting friction can force the bar backward, releasing chain tension.
How do I know what size chain replacement to buy for my Remington saw?
Check the base of your existing guide bar near the mounting slot; most bar stampings show the exact pitch (usually 3/8" Low Profile), gauge (.050"), and drive link count (52 for 14-inch, 56 for 16-inch). Matching these three parameters guarantees correct fitment.
Sources
- OSHA Logging Safety Standards & Hand Tool Guidelines
- ANSI B175.1 Safety Requirements for Chainsaws
- Wikipedia: Chainsaw Components and Safety Systems