Quick answer: Using a rotary tool fitted with the official Dremel chainsaw sharpener attachment (Kit A679-02) lets you accurately sharpen chainsaw teeth in under five minutes. By mounting the angled angle-guide attachment and selecting the correct stone diameter—such as 5/32" for 3/8" Low Profile or 7/32" for standard 3/8" pitch—you maintain precise factory cutting angles without hand filing fatigue.
Electric rotary sharpening offers speed and uniformity that manual files struggle to match. By using a high-speed grinding stone held at a controlled angle, you remove damaged metal cleanly, restore the working corner of each cutter, and keep your chain cutting wide, crisp wood chips instead of fine powdery dust. Let us dive into the mechanics, setup, and practical steps needed to turn your Dremel into a bench-grade chain grinder.
Understanding How the Dremel Chainsaw Sharpener Works
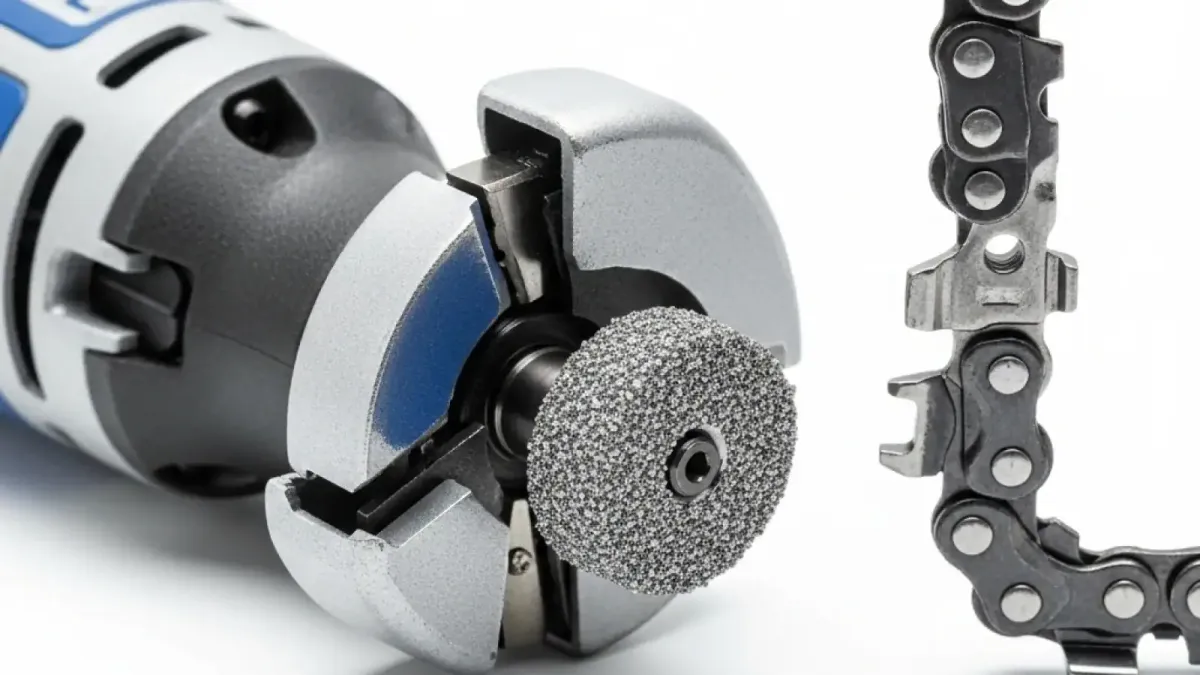
The core of the Dremel sharpening system relies on the A679-02 Attachment Kit, which threads directly onto the nose cap of standard Dremel corded and cordless rotary tools (including models 3000, 4000, 4300, and the 8220 12V platform). The plastic guide housing features pre-molded angle notches stamped directly into the collar. These alignment marks lock your grinding stone precisely at a 30-degree or 35-degree angle relative to the guide bar.
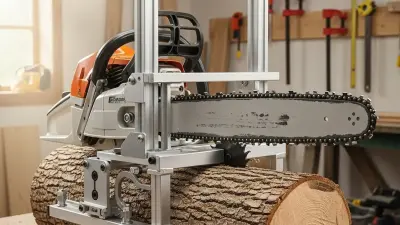
When an engine fires up on a 50cc landowner saw like the Stihl MS 271 or husqvarna 450 rancher, the chain drives around the bar at speeds exceeding 50 feet per second. Every single cutter tooth hits the wood thousands of times per minute. Hand filing often leaves minor inconsistencies in tooth length and top-plate angle. The rigid guide plate on a Dremel sharpener bridges across two adjacent cutter teeth, ensuring the grinding stone contacts the gullet and top plate at the exact depth and angle every single time.
Rotary sharpening operates at high rotational speeds—typically between 15,000 and 20,000 RPM. At these speeds, pink aluminum oxide or diamond-coated grinding stones slice through hardened cutter steel easily. Unlike slow hand files that drag across metal, the rotary motion leaves a polished edge on the cutter's chrome plating, extending your time between resharpenings during heavy cutting sessions.
Choosing the Right Grinding Stone Size for Your Chain Pitch
Chainsaw Chains are not one-size-fits-all. Using the wrong diameter stone destroys the tooth profile by undercutting the gullet or flattening the top-plate cutting corner. To select the right attachment bit, you must identify your chain’s pitch and gauge, usually stamped right on the tail of the guide bar or detailed in your owner's manual.
Chain pitch represents the average distance between drive rivets. The three most popular chain sizes found on homeowner, farm, and commercial saws require matching stone sizes:
- 3/16 inch (4.8 mm) Stone: Designed specifically for .325" pitch chains, common on 40cc to 50cc mid-range saws running 16-inch or 18-inch bars.
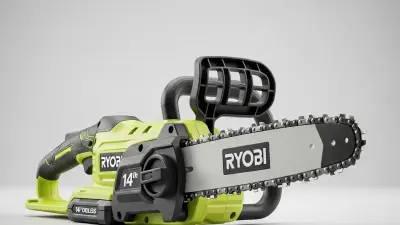
- 5/32 inch (4.0 mm) Stone: Used for 3/8" Low Profile (LP or Picco) chains found on compact gas saws under 40cc and most battery-powered saws (like 12-inch to 16-inch models).
- 7/32 inch (5.5 mm) Stone: Standard for full-size 3/8" pitch chains used on professional 60cc to 90cc logging saws with 20-inch to 24-inch bars.
- 11/64 inch (4.5 mm) Stone: Frequently used for specialized 1/4" pitch pole saw chains and micro-chains.
The following specs table breaks down common chainsaw chain setups, their typical application ranges, and the precise Dremel stone diameter required to keep them cutting smoothly:
| Chain Pitch | Typical Bar Length | Engine / Power Type | Dremel Stone Diameter | Standard Top-Plate Angle |
|---|---|---|---|---|
| 3/8" Low Profile (LP) | 12" - 16" | 30cc - 40cc / Battery | 5/32" (4.0 mm) | 30 Degrees |
| .325" Pitch | 16" - 18" | 40cc - 55cc Gas | 3/16" (4.8 mm) | 30 Degrees |
| 3/8" Standard Pitch | 18" - 24"+ | 55cc - 90cc Gas | 7/32" (5.5 mm) | 30 to 35 Degrees |
| .404" Pitch | 24" - 36"+ | 70cc+ Heavy Commercial | 7/32" or 1/4" (5.5-6.3 mm) | 30 Degrees |
Step-by-Step Guide: How to Sharpen a Chainsaw with a Dremel
Sharpening a chain on the bar saves time, but proper preparation keeps you safe and yields the cleanest cutting edges. Before mounting your rotary tool, set your saw on a stable workbench, turn off the engine, set the chain brake, and ensure you are wearing safety glasses and thick leather work gloves to protect your hands against razor-sharp metal burrs.
- Clean and Tension the Chain: Scraping sap, pitch, and dirt off the cutters allows the guide to sit flush. Tighten your chain tensioning screw slightly higher than normal operational tension so the cutters do not tip backwards under grinding pressure.
- Mount the Dremel Attachment: Unscrew the standard housing cap from your Dremel. Insert the correct size grinding stone into the collet, tighten the collet nut using your wrench, and screw the plastic angle guide collar securely onto the tool housing.
- Mark Your Starting Point: Use a red or silver permanent marker to color the top plate of your master cutter tooth. This simple trick prevents you from grinding teeth twice or missing cutters around the loop.
- Align the Guide Plate: Place the flat metal or molded plastic guide face directly on top of the chain's top plate. Align the etched 30-degree line parallel to the guide bar. The grinding stone should rest snugly inside the curved gullet of the cutter.
- Grind with Light Touch: Turn on your Dremel tool to a medium-low speed (15,000 RPM is ideal). Gently push the stone forward into the cutting edge for 2 to 3 seconds using light finger pressure. Never force the tool—let the high RPM metal removal do the work. Two short passes per tooth are usually enough unless the edge is severely chipped.
- Sharpen One Side First: Move down the bar, sharpening only the left-hand cutters that point in the same direction. Once your master marked tooth returns, flip the saw around on your workbench and sharpen all right-hand cutters using the opposite angle reference line.
Pro tip: A mistake I see constantly on job sites is operators grinding each tooth until it looks shiny without checking cutter length. If you ground away a heavy nick on one side, you must bring the remaining teeth down to a similar length. Uneven cutter lengths cause the saw to pull heavily to one side mid-cut, binding your bar in hard oak or maple logs.
Maintaining Depth Gauges (Rakers) for Smooth Cutting
Sharpening the top and side plates of your cutter teeth is only half the job. Directly in front of every cutting tooth sits a rounded metal fin called a depth gauge, commonly known as a raker. The raker controls how deep the cutting tooth bites into the wood grain with every revolution. As you grind back the cutter tooth over multiple sharpenings, the top plate drops lower, but the raker stays at its original height.
If your rakers are too high, the cutting edge cannot bite into the timber. Your saw will produce fine sawdust, smoke constantly, and refuse to cut even though the teeth feel sharp to the touch. Conversely, filing rakers down too low allows teeth to take massive bites of wood, causing violent bouncing, severe vibration, and dangerous kickback risks. Standard raker clearance sits between .025 inches (0.63 mm) for general wood cutting and .030 inches for softwoods.
Use a flat progressive depth gauge tool to check raker height every two to three sharpening sessions. Drop the steel gauge over two adjacent teeth; if the raker sticks up through the center slot, flat-file it flush using a fine cut mill file. While some users attempt to grind rakers using flat grinding stones on a Dremel, using a hand file gives you far better tactile control, keeping the leading edge rounded for smooth chain entry into the cut. For step-by-step guidance on keeping your saw running smoothly beyond sharpening, check out our comprehensive DIY chainsaw maintenance guides.
Dremel Sharpener vs. Hand Filing vs. Benchtop Grinders
Choosing the best sharpening method comes down to where you work, how many saws you maintain, and your budget. Hand filing with a round file and file guide costs very little and works anywhere, making it ideal for touch-ups deep in the woods. However, it requires precise wrist mechanics to maintain consistent angles across every tooth.
Stationary benchtop hydraulic grinders offer unmatched precision and handle severely damaged, rock-struck chains quickly. However, quality bench units cost hundreds of dollars, require permanent shop bench space, and demand complete chain removal from the guide bar before sharpening.
The Dremel rotary attachment hits the sweet spot for homeowners, landowners, and firewood cutters. It delivers shop-level angle consistency directly on the bar at a fraction of the cost of heavy electric bench grinders. Learning proper chainsaw safety practices and operating techniques ensures you get the most out of your freshly sharpened cutting gear.
Extending the Life of Your Grinding Stones
Aluminum oxide stones included in standard rotary sharpener kits wear down over time. Pushing hard against tempered tooth steel grooves the stone, altering its outer diameter and rounding off critical edge radii. To maximize stone life and keep grinding profiles accurate:
- Maintain medium speeds (12,000 to 18,000 RPM). Running your rotary tool at full 35,000 RPM burns the stone binders and can soften the temper of your chain's tooth steel through excessive thermal buildup.
- Avoid heavy forward pressure. Light, pulsing contact prevents hot spots and preserves the factory abrasive shape.
- Clean clogged stones using a dressing stone or brass wire brush to remove aluminum and pitch glaze build-up.
- Consider upgrading to electroplated diamond rotary bits if you sharpen hardened full-chisel or carbide-tipped chains regularly. Diamond bits cost slightly more upfront but hold their precise shape indefinitely without wearing down.
To pick out reliable gear built for heavy cutting demands, take a look at our expert chainsaw equipment reviews and field tests before buying your next saw or maintenance setup.
If you maintain one or two saws for seasonal tree trimming, clearing storm debris, or cutting winter firewood, the Dremel chainsaw sharpener attachment is one of the most cost-effective tools you can add to your workshop. By spending five minutes matching your stone size to your chain pitch, maintaining a steady 30-degree guide angle, and double-checking your raker clearance, you keep your chainsaw cutting fast, straight, and safely through any log thrown your way.
Frequently Asked Questions
Can I use a Dremel to sharpen a chainsaw without the attachment guide?
While you can hold a bare rotary stone in the gullet freehand, it is not recommended. Without the flat guide plate resting across the chain to stabilize your angle, the high-speed stone easily chatters, creating uneven cutting angles and gouging the thin drive link tie straps.
What RPM speed should I set my Dremel tool to for sharpening?
Set your rotary tool between 15,000 and 20,000 RPM (typically speed setting 3 or 4 on a 5-speed Dremel 3000 or 4000). Speeds higher than 20,000 RPM generate excessive friction heat, which can ruin the heat treatment (temper) of your saw chain cutters, rendering the steel soft and unable to hold an edge.
How do I know which stone size came with my Dremel kit?
Most Dremel A679-02 kits include three distinct stone sizes in the package: 5/32" (4.0mm), 3/16" (4.8mm), and 7/32" (5.5mm). Compare the shank base markings or hold the stone up to your chain gullet; the stone should fit snugly into the curve of the tooth without overlapping the top plate or binding against the drive link below.
Sources
- Dremel Official Tool & Attachment Specifications Guide
- Oregon Tool Maintenance & Chain Sharpening Technical Manual
- ANSI B175.1 Safety Requirements for Gasoline-Powered Chain Saws
- OSHA Standard 1910.266 - Logging Operations & Equipment Safety