

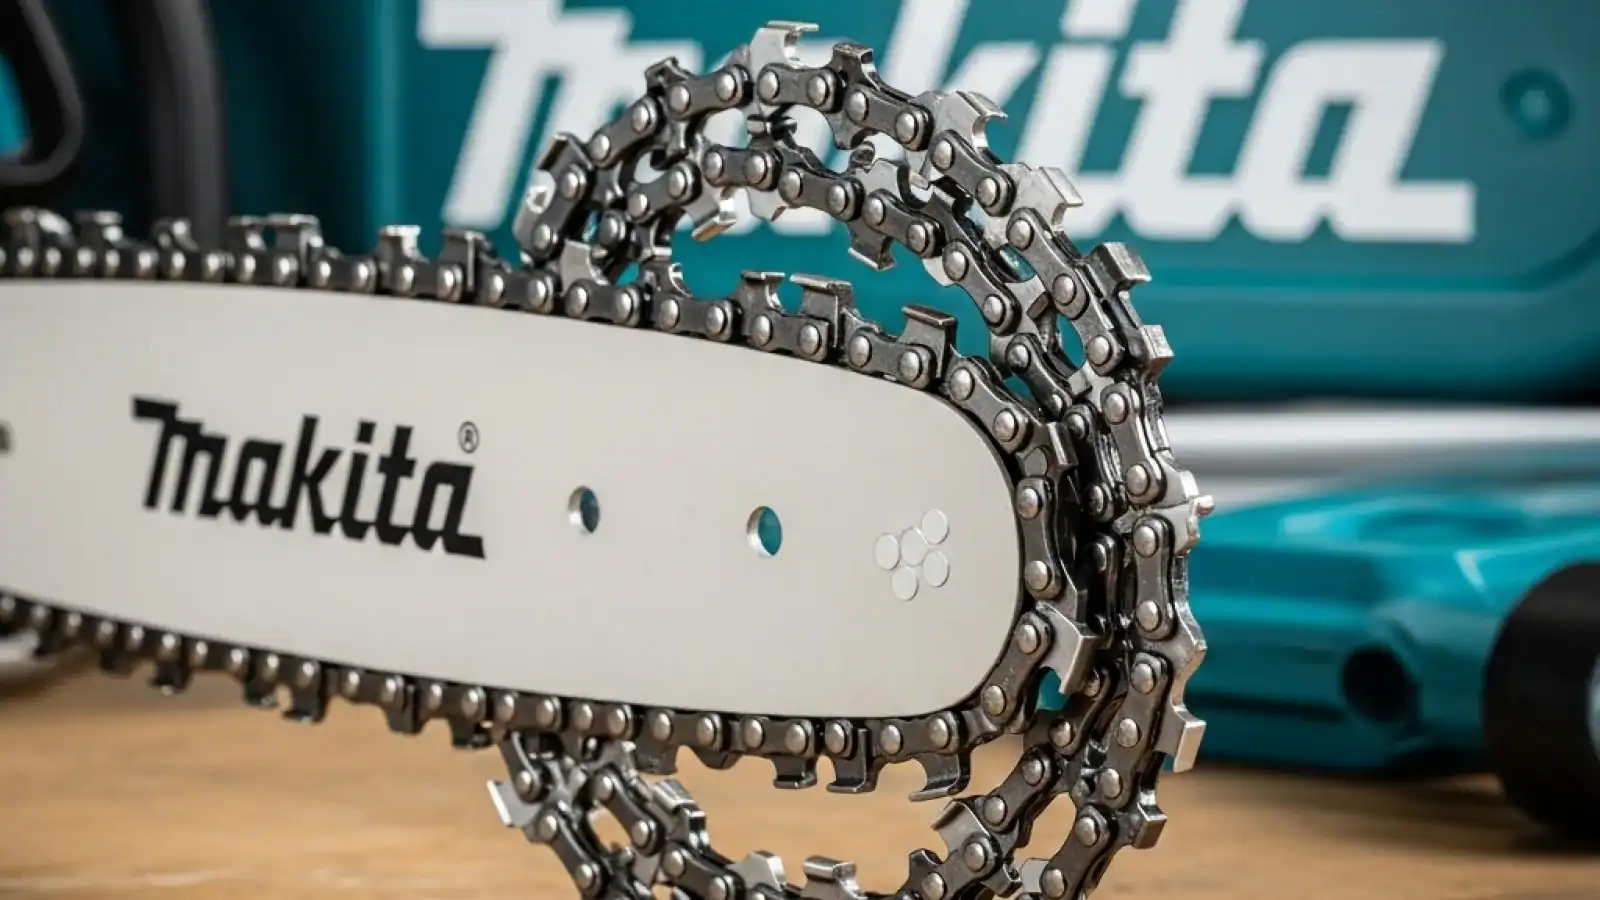

As an experienced arborist and outdoor power equipment specialist, I’ve seen firsthand how a chainsaw chain can make or break your day. It’s the business end of your saw, the part that actually interacts with the wood, and its condition directly impacts your cutting efficiency, safety, and the overall health of your chainsaw. When it comes to Makita, a brand renowned for its robust and reliable power tools, understanding their chainsaw chains is paramount for any user, from the weekend warrior to the seasoned landowner.
Table Of Content
- Understanding Makita Chainsaw Chain Basics: Why it Matters
- Pitch: The Heart of the Chain
- Gauge: The Bar’s Best Friend
- Drive Links: Counting for Compatibility
- Common Makita Chainsaw Chain Sizes and Models
- Makita’s Cordless Powerhouses: DUC Series Chains
- Chains for Compact and Mid-Range Tasks
- Heavy-Duty Chains for Demanding Jobs
- Choosing the Right Makita Chainsaw Chain Type for Your Task
- Low-Profile Chains: Safety First
- Semi-Chisel Chains: The All-Rounder
- Full-Chisel Chains: Aggression for Experienced Users
- Specialty Chains: Beyond the Basics
- The Makita Chainsaw Chain Replacement Process: A Step-by-Step Guide
- Essential Safety First
- Pre-Replacement Checks
- Step-by-Step Chain Removal
- Installing Your New Makita Chain
- Tensioning for Optimal Performance
- Post-Installation Test and Adjustment
- Maintaining Your Makita Chainsaw Chain for Longevity and Performance
- Sharpening Your Makita Chain: Keeping it Keen
- Lubrication: The Lifeblood of Your Chain and Bar
- Cleaning and Inspection: Post-Job Rituals
- Proper Storage: Protecting Your Investment
- Where to Buy and Final Thoughts
- Sourcing Genuine Makita Chains: Online vs. Local Retailers
- A Note on Aftermarket Chains
- My Take: Investing in Quality Pays Off
A well-chosen and properly maintained Makita chainsaw chain isn’t just a component; it’s an investment in smoother cuts, reduced effort, and a safer working environment. Imagine trying to cut through a stubborn log with a dull or mismatched chain – it’s a frustrating, energy-draining experience that puts undue stress on both you and your saw. Conversely, a sharp, correctly sized, and appropriate chain type transforms the task into a satisfying, efficient process. This guide will demystify Makita chainsaw chains, ensuring you know exactly what to look for and how to keep your saw performing at its peak.
Understanding Makita Chainsaw Chain Basics: Why it Matters
Before we dive into specific sizes and types, let’s clarify the fundamental characteristics that define any chainsaw chain, including those from Makita. These aren’t just arbitrary numbers; they are precise measurements that ensure the chain, guide bar, and sprocket work together in perfect harmony. Ignoring these details is like trying to put square pegs in round holes – it simply won’t work, and worse, it can be dangerous.
From my years in the field, I’ve learned that a common mistake for newcomers is assuming all chains are interchangeable. This couldn’t be further from the truth. Each Makita chainsaw model is engineered to operate with a specific chain configuration. Mismatched components can lead to poor cutting performance, excessive vibration, rapid wear of the bar and sprocket, and critically, increased risk of kickback or chain derailment. Getting these basics right is the foundation of safe and efficient chainsaw operation.
Pitch: The Heart of the Chain
Chain pitch is arguably the most crucial measurement. It’s the average distance between three consecutive rivets on the chain, divided by two. Common pitches for Makita chainsaws typically include 3/8″ Low Profile (also written as .375″ LP) for smaller, homeowner-grade saws, and .325″ or standard 3/8″ for larger, more powerful models. You’ll find the pitch stamped on the guide bar, often near the mounting end.
Why does pitch matter so much? It dictates how the chain links engage with the drive sprocket on your chainsaw and the nose sprocket on your guide bar. A mismatched pitch means the chain won’t fit the sprockets correctly, causing damage, premature wear, and potential derailment. Always ensure your replacement chain’s pitch matches both your sprocket and guide bar specification.
Gauge: The Bar’s Best Friend
The chain gauge refers to the thickness of the drive links – the small teeth on the underside of the chain that fit into the groove of the guide bar. Common gauges include .043″, .050″, .058″, and .063″. Like pitch, the gauge specification is typically stamped on your guide bar.
The gauge must precisely match the groove width of your guide bar. If the chain’s gauge is too thin, it will wobble in the bar groove, leading to unstable cutting and excessive wear. If it’s too thick, it simply won’t fit into the bar groove at all. Ensuring a perfect fit helps guide the chain smoothly, reducing friction and extending the life of both the chain and the bar.
Drive Links: Counting for Compatibility
Finally, the number of drive links is vital because it determines the overall length of the chain. This count must match the length of your guide bar. A 14-inch bar, for example, will require a specific number of drive links, which will be different from an 18-inch bar, even if they share the same pitch and gauge.
You can find the drive link count on your existing chain’s packaging, or you can count them manually. Simply lay your old chain flat and count the number of drive links. This number, along with the pitch and gauge, provides the complete “fingerprint” of the chain you need. Always verify these three specifications before purchasing a replacement.
Common Makita Chainsaw Chain Sizes and Models
Makita offers a wide array of chainsaws, from compact cordless models perfect for limbing to more powerful options for felling small trees. Each model comes with a specific guide bar length, which in turn dictates the chain size. Understanding which chains fit which popular Makita models will help you make an informed decision.
In my experience, many homeowners gravitate towards Makita’s cordless electric chainsaws for their convenience and lower maintenance. However, Makita also produces robust corded electric and even some lesser-known gas models (though their focus has heavily shifted to battery power). For any Makita saw, the principle remains the same: match the chain to the bar.
Makita’s Cordless Powerhouses: DUC Series Chains
Makita’s DUC (Cordless Chainsaw) series is incredibly popular, and models like the DUC302, DUC353, DUC400, and DUC401 are staples for many users. The Makita Chainsaw Chain DUC353, for instance, is a highly sought-after replacement. This model typically utilizes a 35cm (approximately 14-inch) guide bar, requiring a chain with 52 drive links, .043″ gauge, and 3/8″ LP pitch. It’s designed for smooth, low-vibration cutting, ideal for general property maintenance and firewood cutting.
Larger models like the Makita DUC400 or DUC401 often come with a 40cm (16-inch) bar, requiring a chain with 56 drive links, .043″ gauge, and 3/8″ LP pitch. These saws offer a bit more reach and power, making them suitable for felling smaller trees or bucking larger logs. Always double-check your specific model’s manual or the markings on your existing guide bar, as specifications can sometimes vary by region or production batch.
Chains for Compact and Mid-Range Tasks
For lighter duties, such as pruning small branches or clearing brush, Makita offers compact saws with shorter bars. A Makita chainsaw chain 14 inch is a very common size for these applications. These often use a 3/8″ LP pitch and a .043″ or .050″ gauge. These smaller chains are designed for agility and precision, making them perfect for detailed work without the bulk of a larger saw.
Mid-range saws, often featuring a Makita chainsaw Chain 35cm (which translates to about 13.8 inches, typically rounded to 14 inches in the US market), strike an excellent balance between portability and cutting capacity. These are your go-to saws for general yard work, managing fallen limbs, or preparing a season’s worth of firewood. They commonly feature a .050″ gauge and .325″ pitch or 3/8″ LP pitch, depending on the saw’s power output.
Heavy-Duty Chains for Demanding Jobs
When you’re tackling more substantial tasks, such as felling medium-sized trees or processing large logs for firewood, you’ll likely be using a Makita chainsaw with an 18-inch bar or even longer. Chains for these applications are built for durability and aggressive cutting. They typically feature a .050″, .058″, or .063″ gauge and either a .325″ or a standard 3/8″ pitch (not low profile).
These chains are designed to withstand the higher forces and demands of larger timbers. While Makita’s primary focus in recent years has been on cordless tools, some of their older or specialized models might still offer these longer bar options. Remember, the longer the bar, the more powerful the chainsaw motor needs to be to drive the chain efficiently without bogging down.
Choosing the Right Makita Chainsaw Chain Type for Your Task
Beyond size and fit, the design of the cutting tooth itself plays a significant role in how the chain performs. Makita offers various chain types, each optimized for different cutting scenarios and user skill levels. Selecting the correct type can dramatically improve your cutting experience, enhance safety, and prolong the life of your equipment.
I always tell my apprentices that the type of chain is just as important as its sharpness. Using a highly aggressive chain for a task that requires precision, or a gentle chain for heavy felling, can lead to frustration, inefficiency, and even danger. Let’s break down the most common chain tooth profiles you’ll encounter for Makita chainsaws.
Low-Profile Chains: Safety First
Low-profile chains, often referred to as low-kickback chains, are characterized by their smaller, rounded cutter teeth and additional guard links or depth gauges designed to reduce the risk of kickback. They are standard on most homeowner-grade and smaller professional-grade Makita chainsaws, especially those with 3/8″ LP pitch.
These chains are an excellent choice for beginners, occasional users, and anyone prioritizing safety. While they might cut slightly slower than more aggressive options, their kickback-reducing features make them significantly safer, especially when encountering foreign objects or performing awkward cuts. Makita often supplies these types of chains as original equipment on their cordless models like the DUC353 for this very reason.
Semi-Chisel Chains: The All-Rounder
Semi-chisel chains feature a rounded working corner on the cutter tooth. This design makes them more forgiving than full-chisel chains, less prone to dulling quickly when cutting dirty wood or encountering small amounts of debris, and easier to sharpen with a round file. They offer a good balance of cutting speed and edge retention.
For most homeowners, landowners, and DIY enthusiasts, a semi-chisel chain is the most versatile and practical choice. Whether you’re cutting firewood, clearing storm damage, or general property maintenance, a semi-chisel Makita chain will deliver consistent performance without requiring constant sharpening or meticulous care. It’s my go-to recommendation for general-purpose use.
Full-Chisel Chains: Aggression for Experienced Users
Full-chisel chains have square-cornered cutter teeth, which are designed to slice through wood fibers with maximum aggression. They are the fastest-cutting chain type, ideal for experienced users working with clean, softwoods and hardwoods. However, their sharp corners are more susceptible to dulling when hitting dirt or debris, and they require more precise sharpening techniques.
While some smaller Makita saws might not be powerful enough to fully exploit a full-chisel chain, larger models (if available) or even the most robust cordless units could benefit from their speed in specific, clean-wood applications. If you’re an experienced operator tackling professional-grade felling or bucking, and your wood is clean, a full-chisel chain can significantly boost productivity. Just be prepared for more frequent sharpening and a higher kickback potential if not handled carefully.
Specialty Chains: Beyond the Basics
Occasionally, you might encounter specialty chains for specific Makita applications. These can include ripping chains (designed for cutting with the grain of the wood, for milling purposes), scratcher chains (for very abrasive conditions), or even carbide-tipped chains for extreme durability in dirty environments. While less common for general homeowner use, knowing they exist can be helpful if you have unique cutting needs. Always consult your Makita saw’s manual to ensure compatibility with any specialty chain.
The Makita Chainsaw Chain Replacement Process: A Step-by-Step Guide
Replacing a chainsaw chain, especially on a Makita, is a fundamental skill every user should master. It might seem daunting at first, but with a few clear steps and a focus on safety, you’ll be swapping chains like a pro in no time. I’ve guided countless individuals through this process, and I can tell you that confidence comes with practice.
A fresh, sharp chain makes all the difference, and knowing how to replace it yourself saves time and money. Before you begin, gather your tools: usually a combination wrench (often supplied with the saw) or a tool-less tensioning system, a pair of heavy-duty gloves, and of course, your new Makita replacement chain. Let’s get started with safety as our absolute priority.
Essential Safety First
Before you even touch the chain, ensure your chainsaw is completely powered off and cannot accidentally start. For cordless Makita models, this means removing the battery pack. For corded electric saws, unplug it from the power source. If you have a gas model, ensure it’s turned off and the spark plug boot is disconnected. Always wear heavy-duty work gloves to protect your hands from the sharp chain teeth.
This isn’t just a recommendation; it’s a non-negotiable safety rule. The number of minor cuts and scrapes I’ve seen from people rushing or forgetting this step is significant. A moment of caution can prevent a trip to the emergency room.
Pre-Replacement Checks
Before removing the old chain, take a moment to inspect your guide bar. Look for burrs along the edges, especially on the top and bottom rails, which can impede chain movement. Check the bar groove for wear and ensure the oiling hole is clear of sawdust and debris. A worn or damaged guide bar can quickly ruin a new chain, so address any issues now.
Also, give your drive sprocket a quick visual inspection. If the teeth are hooked or excessively worn, it’s a good idea to replace it along with your chain and bar. A worn sprocket can cause the new chain to stretch and wear prematurely, reducing its lifespan and performance.
Step-by-Step Chain Removal
- Loosen the Bar Nuts/Tensioner: If your Makita has traditional bar nuts, loosen them until they are finger-tight. If it’s a tool-less tensioning system (common on many DUC series models), simply turn the tensioning knob counter-clockwise to loosen the bar.
- Release Chain Tension: Turn the chain tensioning screw (usually located on the side cover or part of the tool-less system) counter-clockwise to fully slacken the chain.
- Remove the Side Cover: Take off the side cover (or clutch cover). This will expose the drive sprocket and the end of the guide bar.
- Lift Off the Old Chain: Carefully lift the old chain off the drive sprocket and then slide it off the guide bar. Dispose of it safely, as even dull chains can still cut.
Installing Your New Makita Chain
- Position the Guide Bar: Place the guide bar back onto the saw studs, ensuring it’s aligned with the tensioning pin.
- Route the Chain: Take your new Makita chain and carefully place it around the drive sprocket. Ensure the cutting teeth are facing the correct direction – the top of the cutters should face forward, towards the nose of the bar. A common mnemonic is that the sharp edge should lead the cut, like an arrow pointing away from the saw body.
- Fit into Guide Bar Groove: Carefully guide the chain into the groove all the way around the guide bar.
- Replace Side Cover: Reinstall the side cover, making sure the tensioning pin engages correctly with the guide bar. Lightly tighten the bar nuts or hand-tighten the tool-less knob, but don’t fully secure them yet.
Tensioning for Optimal Performance
This is a critical step. With the bar nuts still slightly loose, turn the chain tensioning screw clockwise to tighten the chain. You’re looking for a snug fit, but not overly tight. A good rule of thumb is that you should be able to pull the chain along the top of the bar by hand, and the drive links should still be seated fully in the bar groove. You should also be able to just barely pull the chain’s drive links out of the bar groove at the center, but not enough to expose the full depth of the link.
Once you’ve achieved the correct tension, fully tighten the bar nuts or the tool-less tensioning knob. Recheck the tension after tightening, as it can sometimes change slightly. Over-tightening can cause rapid wear on the bar, chain, and sprocket, and can even damage the saw’s motor. Under-tightening can lead to the chain jumping off the bar, which is both dangerous and frustrating.
Post-Installation Test and Adjustment
With the battery reinserted (or saw plugged in), start the chainsaw and let it run at a low speed for about 30 seconds. This helps the chain seat properly on the bar and sprocket. Shut off the saw, remove the battery/unplug, and re-check the chain tension. It’s common for a new chain to stretch slightly after its initial run, requiring a minor adjustment. Make any necessary tweaks, and you’re ready to cut!
Maintaining Your Makita Chainsaw Chain for Longevity and Performance
A sharp, well-maintained chain is a joy to use. It cuts quickly, cleanly, and puts less strain on your chainsaw and your body. Conversely, a dull chain is arguably the most frustrating aspect of chainsaw operation – it tears at the wood, creates excessive sawdust instead of chips, and dramatically increases the risk of kickback. Proper maintenance isn’t just about extending the chain’s life; it’s about making every cutting session safer and more effective.
Over the years, I’ve seen perfectly good chains ruined by neglect and seemingly old chains last for ages with diligent care. It’s a simple equation: invest a little time in maintenance, and your Makita chain will repay you with reliable performance. Here are the cornerstones of chain care.
Sharpening Your Makita Chain: Keeping it Keen
Regular sharpening is non-negotiable. How often? As a rule of thumb, sharpen your chain every time you refuel your gas saw, or every time you swap out a battery on a cordless Makita, especially if you’re doing heavy cutting. Visually, if the chain is producing fine sawdust instead of crisp wood chips, or if you have to force the saw to cut, it’s dull.
You’ll need a round file of the correct diameter for your chain’s pitch (e.g., 5/32″ for 3/8″ LP, 3/16″ for .325″, 7/32″ for standard 3/8″). Use a filing guide to maintain the correct angle (typically 25-30 degrees, check your manual). File each cutter with consistent, forward strokes from the inside out, applying even pressure. Don’t forget to periodically file down the depth gauges (rakers) with a flat file and depth gauge tool – typically every 3-5 sharpenings – as these control the bite of the cutters.
Lubrication: The Lifeblood of Your Chain and Bar
Your guide bar and chain need constant lubrication to prevent excessive friction, heat build-up, and premature wear. Always ensure your Makita chainsaw’s bar oil reservoir is full before starting work. Use a good quality bar and chain oil; it’s designed with specific tackifiers to cling to the chain and resist flinging off during operation.
A properly oiled chain will sling a fine mist of oil from the tip of the bar when held over a light-colored surface (like a piece of cardboard) at full throttle. Check this regularly. Running your saw dry, even for a short period, can cause irreversible damage to both your chain and guide bar, leading to costly replacements.
Cleaning and Inspection: Post-Job Rituals
After each cutting session, take a few minutes to clean your Makita chainsaw. Remove the side cover, guide bar, and chain. Use a brush or compressed air to clear sawdust, wood chips, and debris from around the drive sprocket, the guide bar groove, and the motor housing. Pay special attention to the oiling port on the guide bar, ensuring it’s not clogged.
While cleaning, inspect the chain for any damaged or broken cutters, cracked drive links, or stretched rivets. Check the guide bar for burrs, especially on the rails. Small burrs can be filed smooth with a flat file. Regular cleaning and inspection not only keep your saw running smoothly but also allow you to catch potential problems before they become serious issues.
Proper Storage: Protecting Your Investment
When not in use, store your Makita chainsaw and its chain properly. If you’ve just finished a job, clean the chain and bar thoroughly to remove any sap or debris. For longer storage periods, consider removing the chain, cleaning it, and lightly oiling it before storing it in a dry place to prevent rust. Never store a chainsaw with a dirty, wet chain.
Keeping your chainsaw chain dry, clean, and lightly oiled during storage will prevent corrosion and ensure it’s ready for action the next time you need it. A little proactive care goes a long way in preserving the cutting performance and lifespan of your Makita chainsaw chain.
Where to Buy and Final Thoughts
Finding the right Makita chainsaw chain is easier than ever, but knowing where to buy ensures you get genuine quality and expert advice. While many retailers stock chains, I always advocate for sourcing your replacements from reputable channels to guarantee compatibility and performance. After all, a chainsaw is only as good as its chain.
My final piece of advice: don’t skimp on quality when it comes to chainsaw chains. A few extra dollars for a well-made, correctly specified chain will save you countless hours of frustration, safer operation, and ultimately, better results in your wood cutting tasks. It’s a small investment that yields significant returns.
Sourcing Genuine Makita Chains: Online vs. Local Retailers
For buyers in Australia and New Zealand, places like Makita Chainsaw Chain Bunnings are a convenient option. Bunnings often stocks a range of genuine Makita replacement chains, compatible bar-and-chain kits, and basic sharpening tools suitable for homeowner use. Their advantage is accessibility and the ability to see the product in person.
Globally, you can find genuine Makita chains through authorized Makita dealers, online power equipment specialists, and large online retailers like Amazon. When buying online, always double-check the seller’s reputation and ensure the product description clearly lists the pitch, gauge, and drive link count to match your specific saw. Having your chainsaw’s model number handy is always a good idea.
A Note on Aftermarket Chains
While genuine Makita chains are always my top recommendation, there are many reputable aftermarket chain manufacturers (e.g., Oregon, Stihl, Husqvarna – many of which produce chains that fit Makita saws). These can sometimes offer cost savings or specialized options not readily available from the original manufacturer.
If you opt for an aftermarket chain, be extra diligent in verifying the pitch, gauge, and drive link count. Stick to well-known brands that have a reputation for quality. While they might fit, cheaper, no-name brands can often be made from inferior steel, dull quickly, or even pose safety risks due to poor construction. Your safety and your saw’s performance are worth the investment in quality.
My Take: Investing in Quality Pays Off
From my professional perspective, treating your chainsaw chain as a critical, high-performance component rather than just a disposable accessory is key. Understanding the nuances of Makita chainsaw chain sizes, types, and the replacement process empowers you to maintain your equipment like a pro, ensuring every cut is as efficient and safe as possible.
Whether you own a nimble Makita DUC353 for pruning or a more robust model for serious tree work, the right chain, properly installed and maintained, is your most valuable asset. Keep it sharp, keep it oiled, and respect its power. Happy cutting!